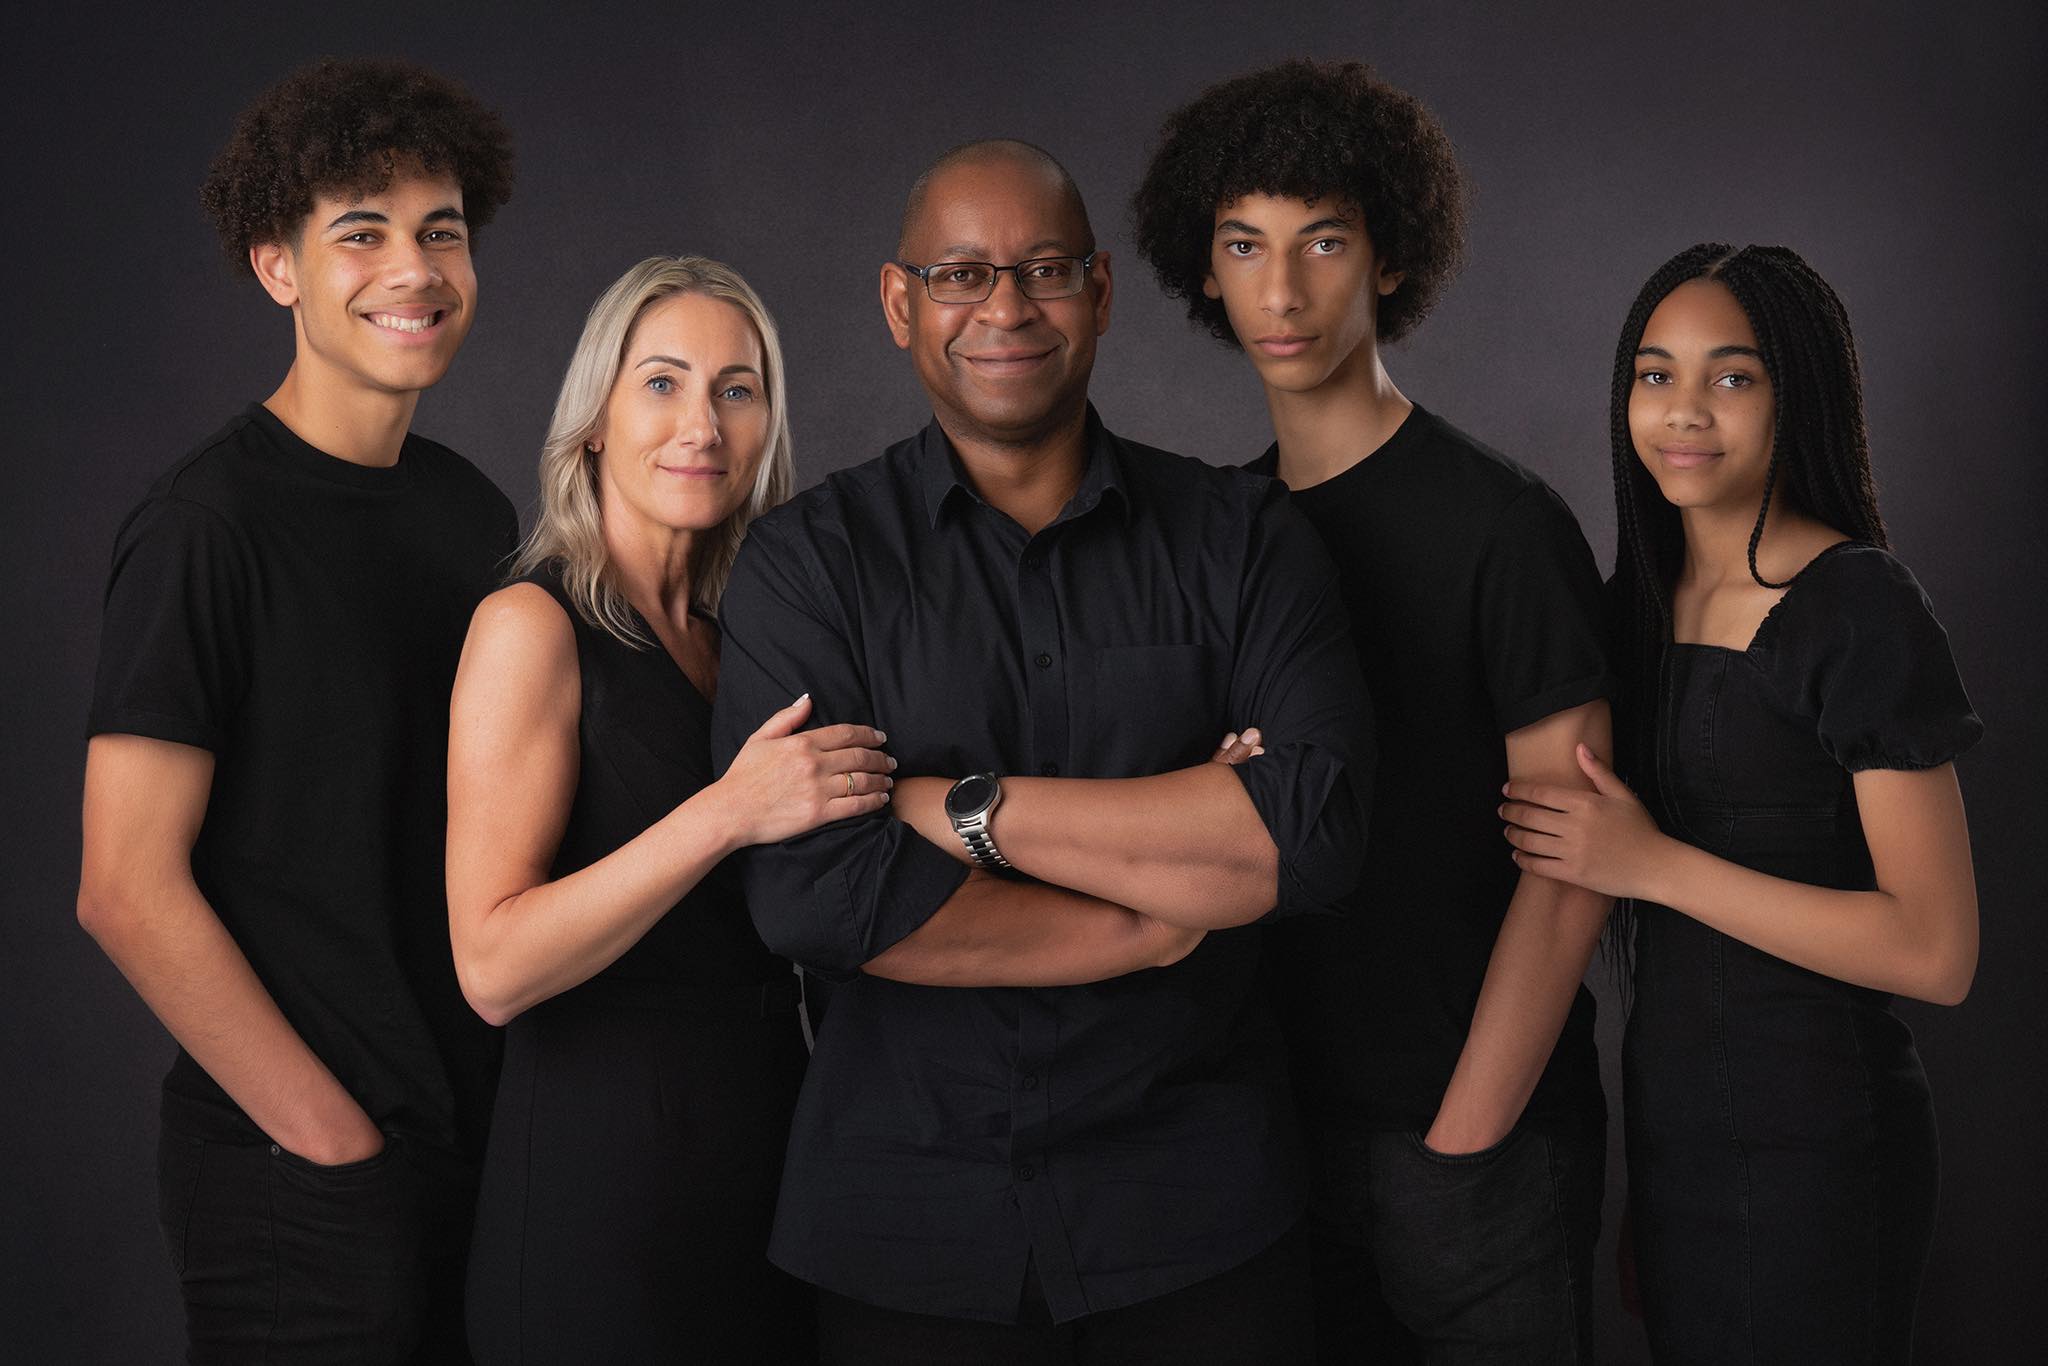
What to wear for your family photographs
In my last blog I spoke about why you should have family portraits – beautiful timeless photographs around the home. But what should you do before the session to ensure they are as good as can be? Firstly, think where you are going to put your portraits. Having those amazing, printed images on your wall is what I want for you, so that you will walk past them every day and see them, the family all together and connected. If you are looking at these images every day for years to come, you want them to stand the test of time. While something might seem really great now in an image, if it is sat there in ten years’ time will you still love it? Those logos, stripes etc will date, so it is something to think about.
Ask the Photographer - What to wear for family photographs
What clothes to wear for your family photography
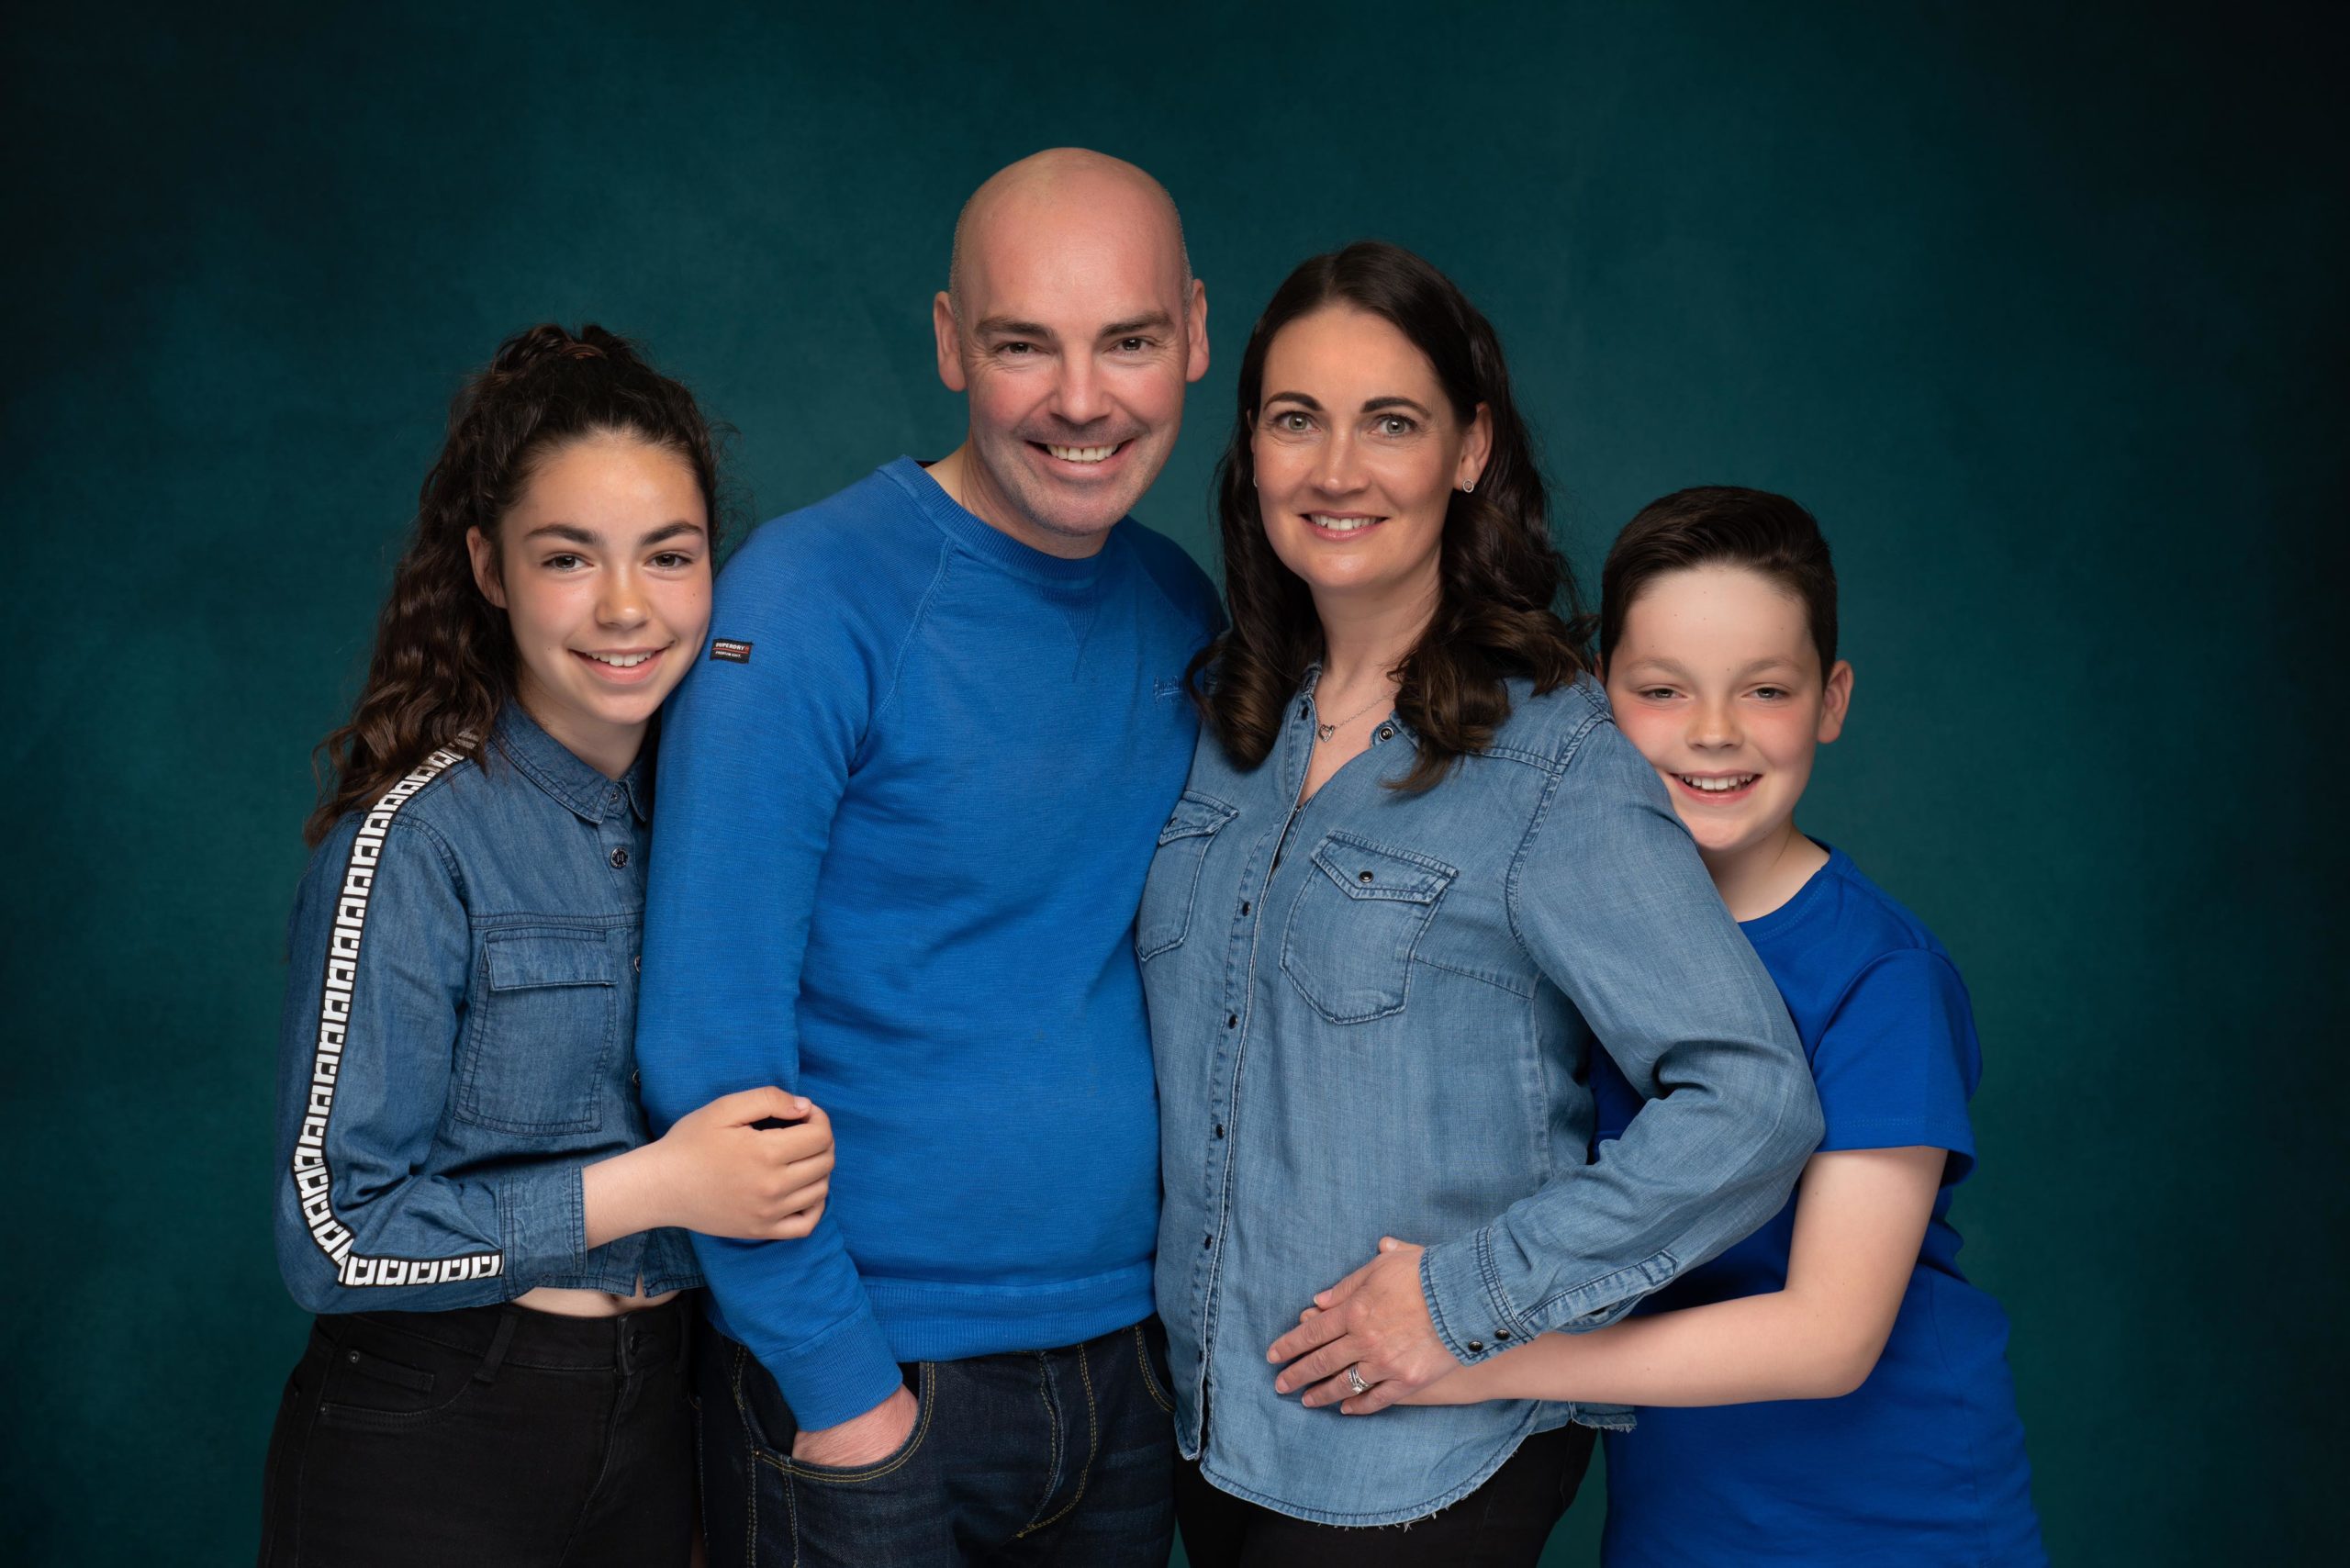
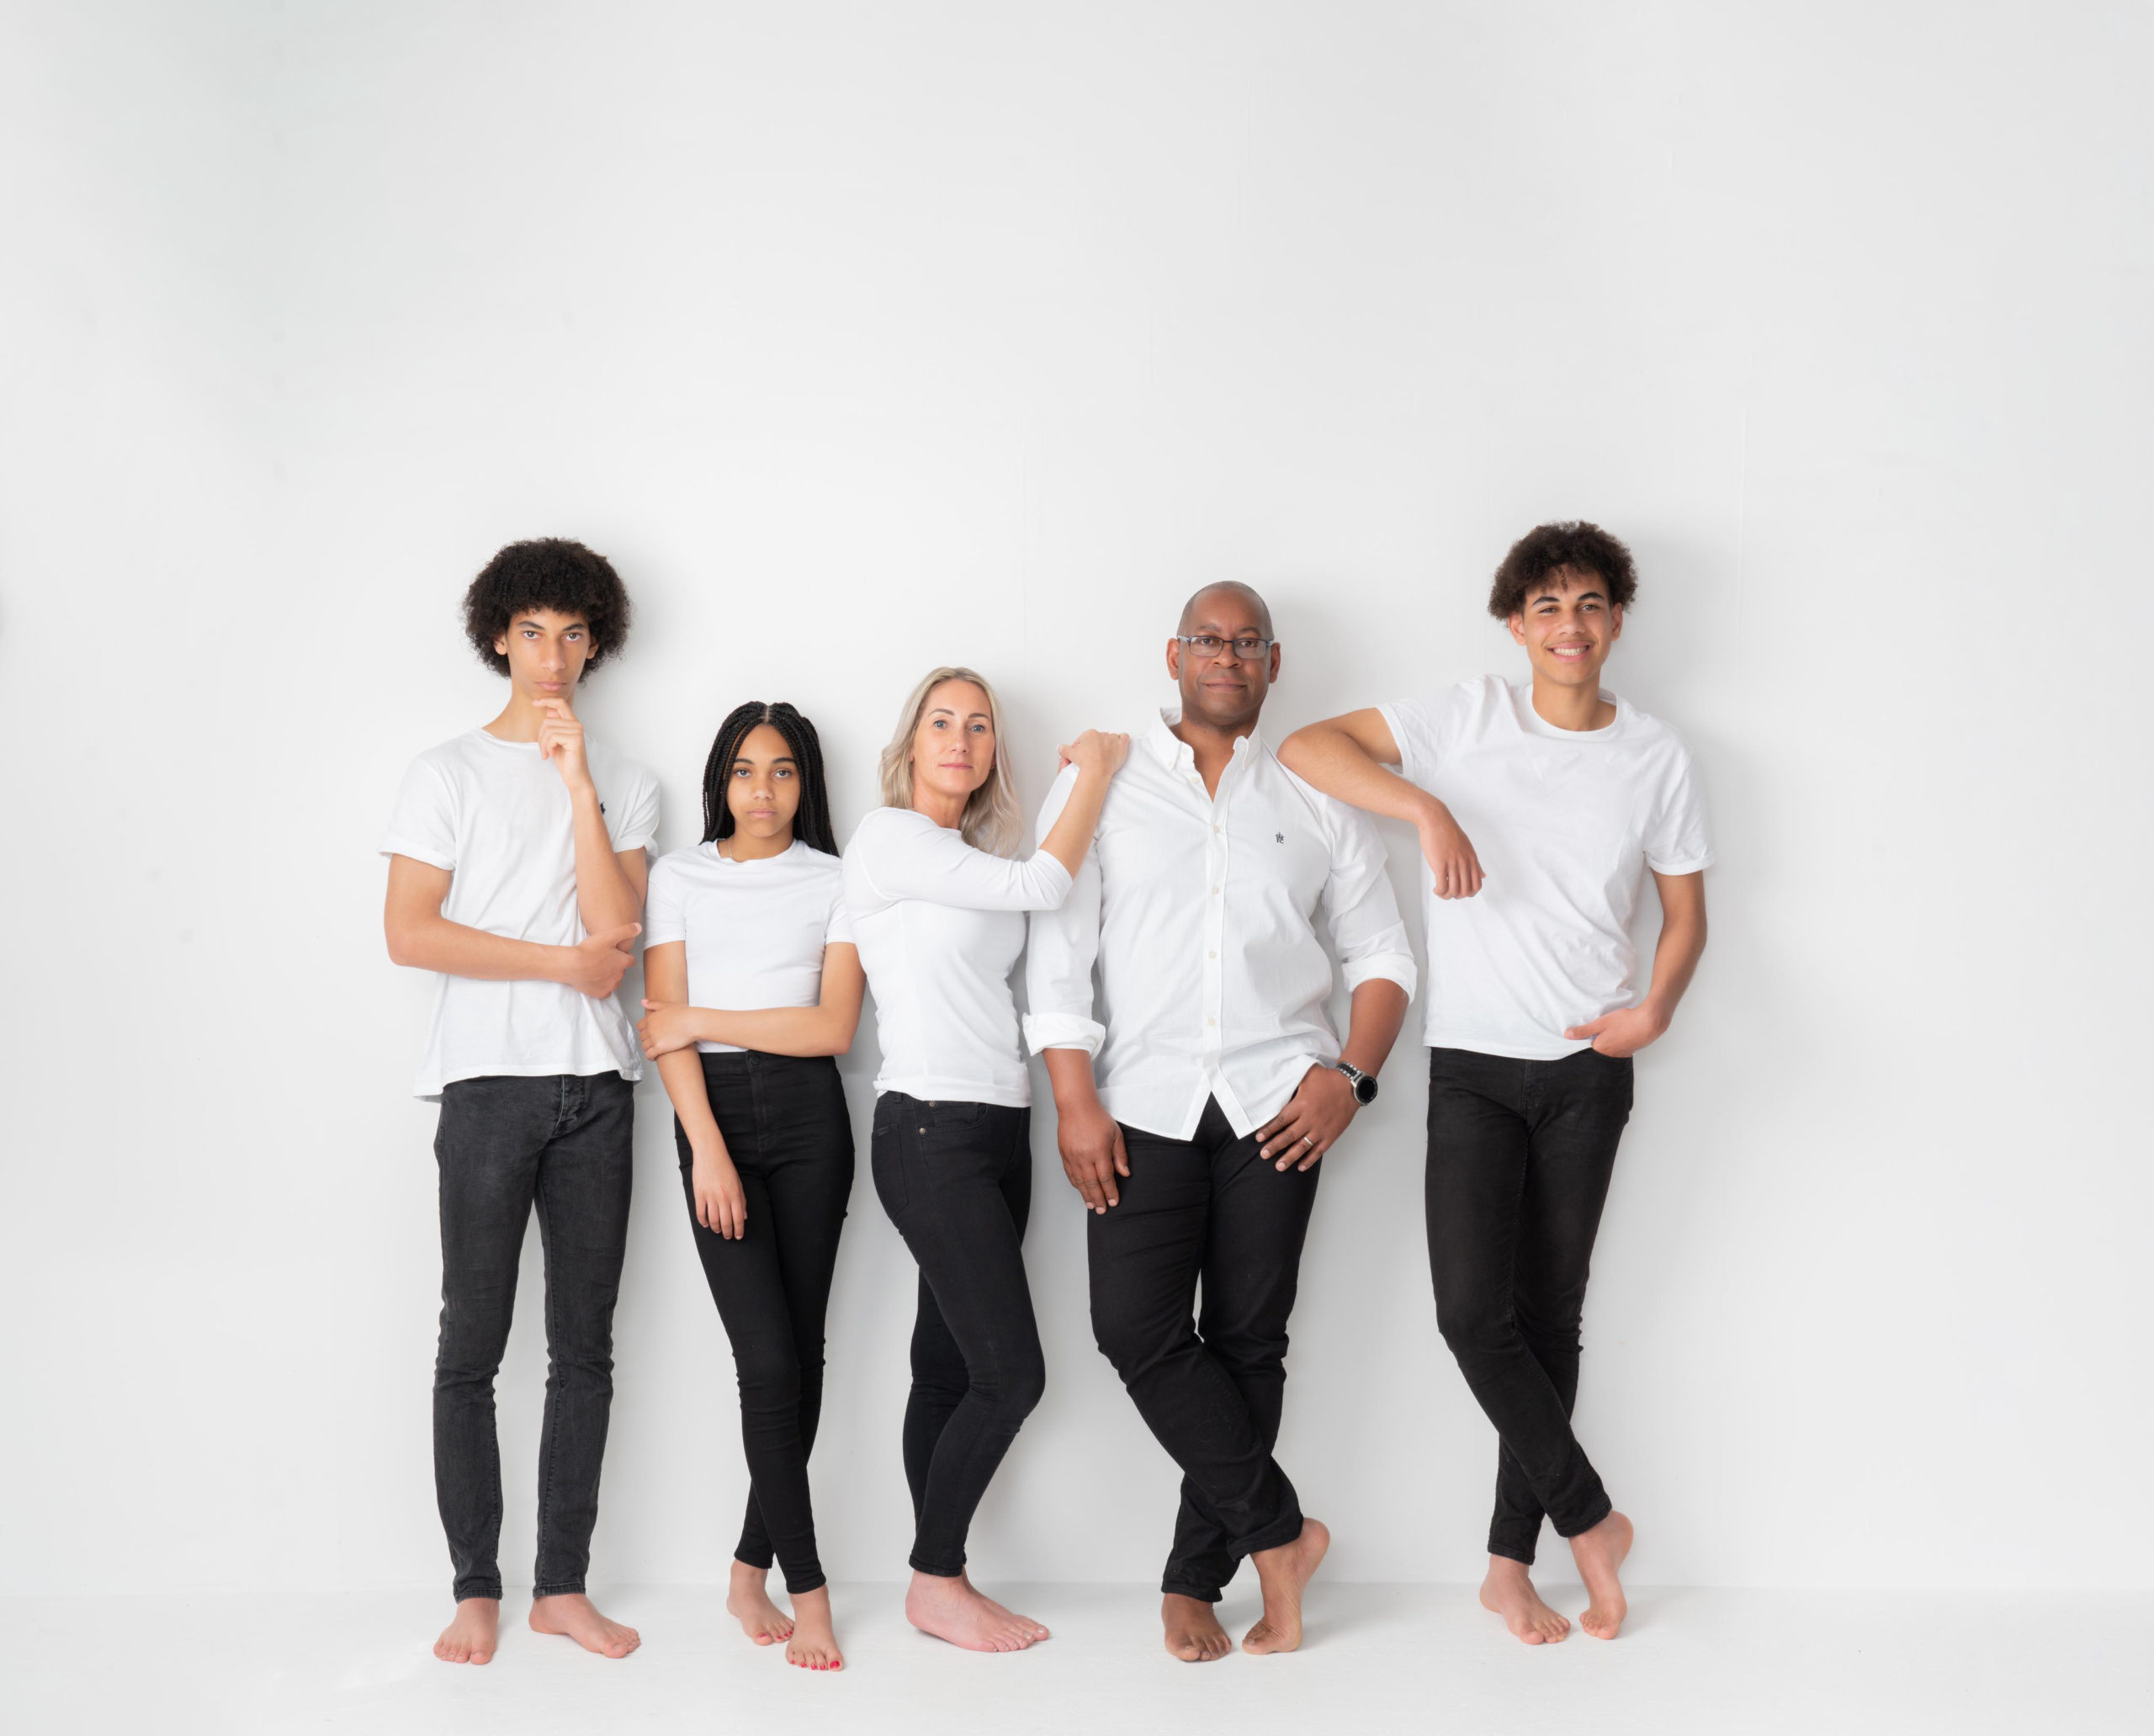
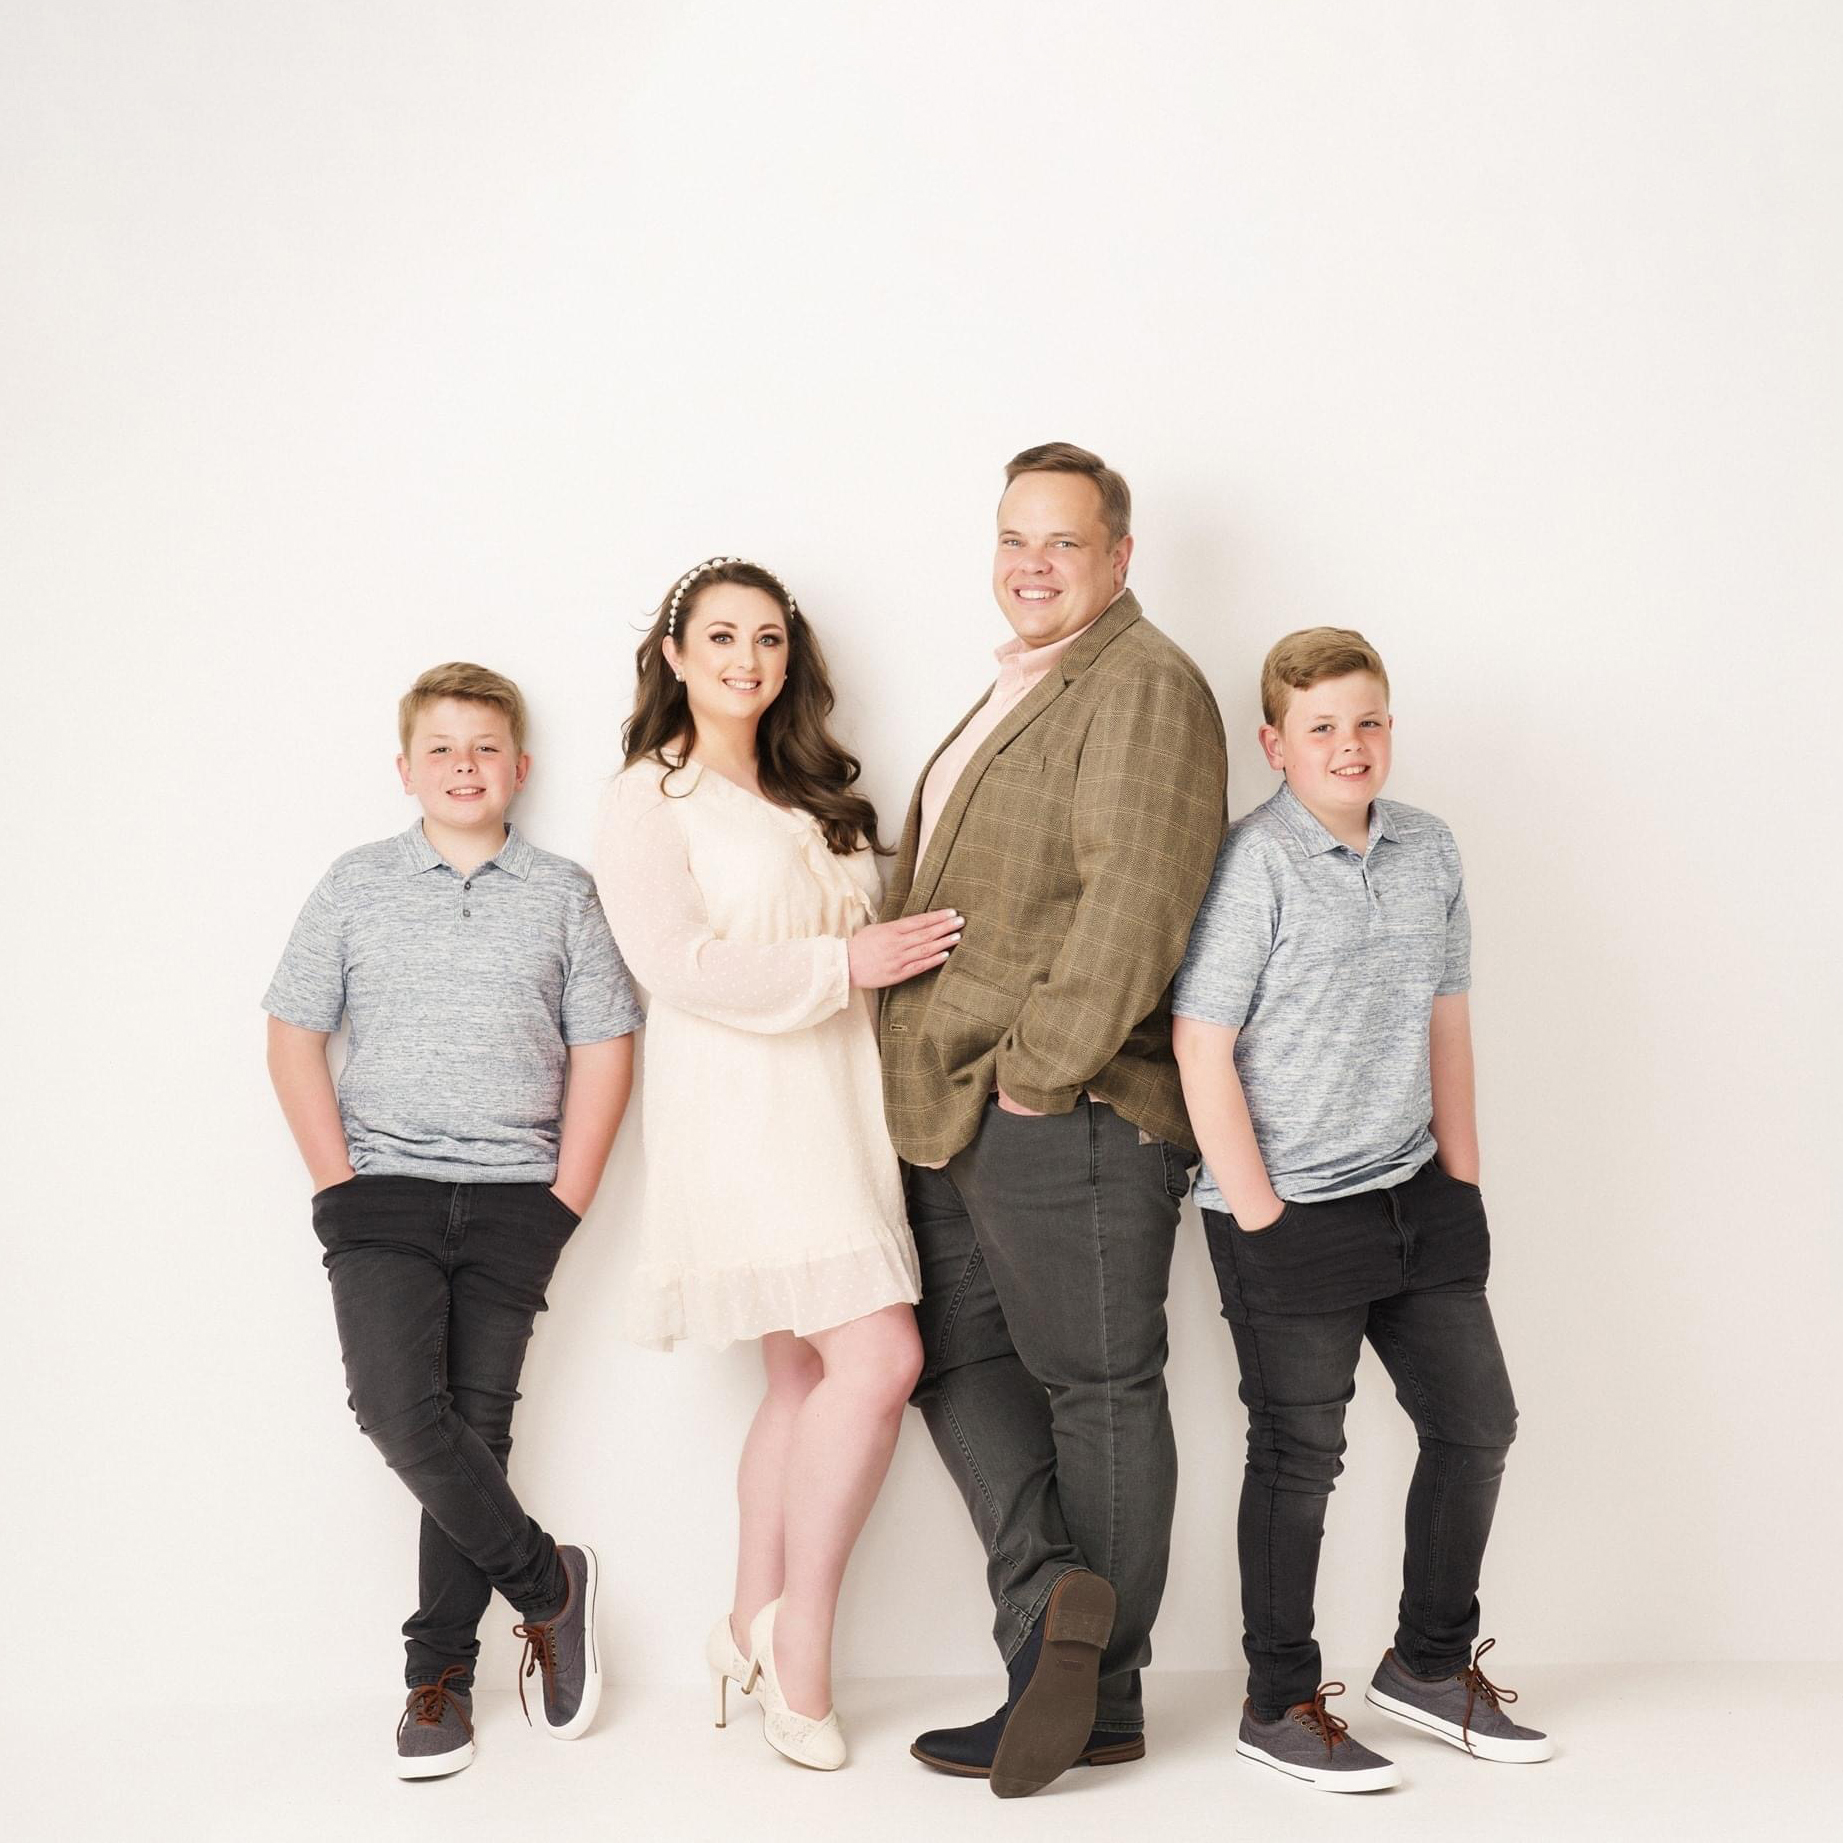
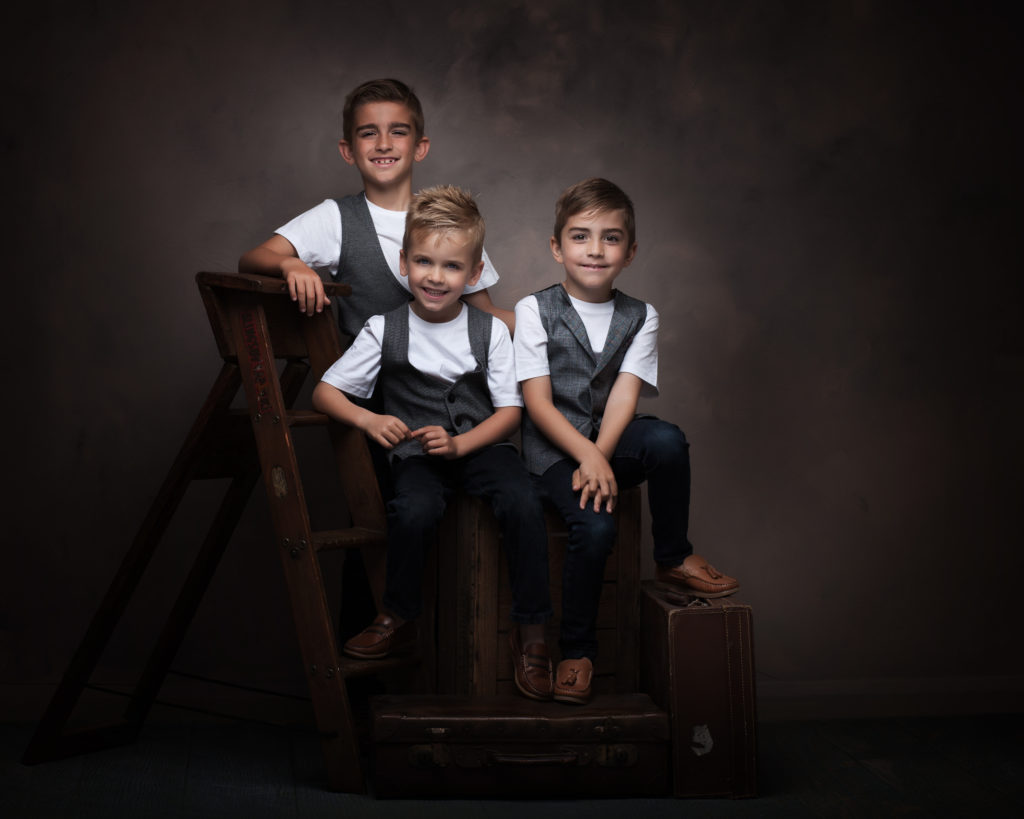
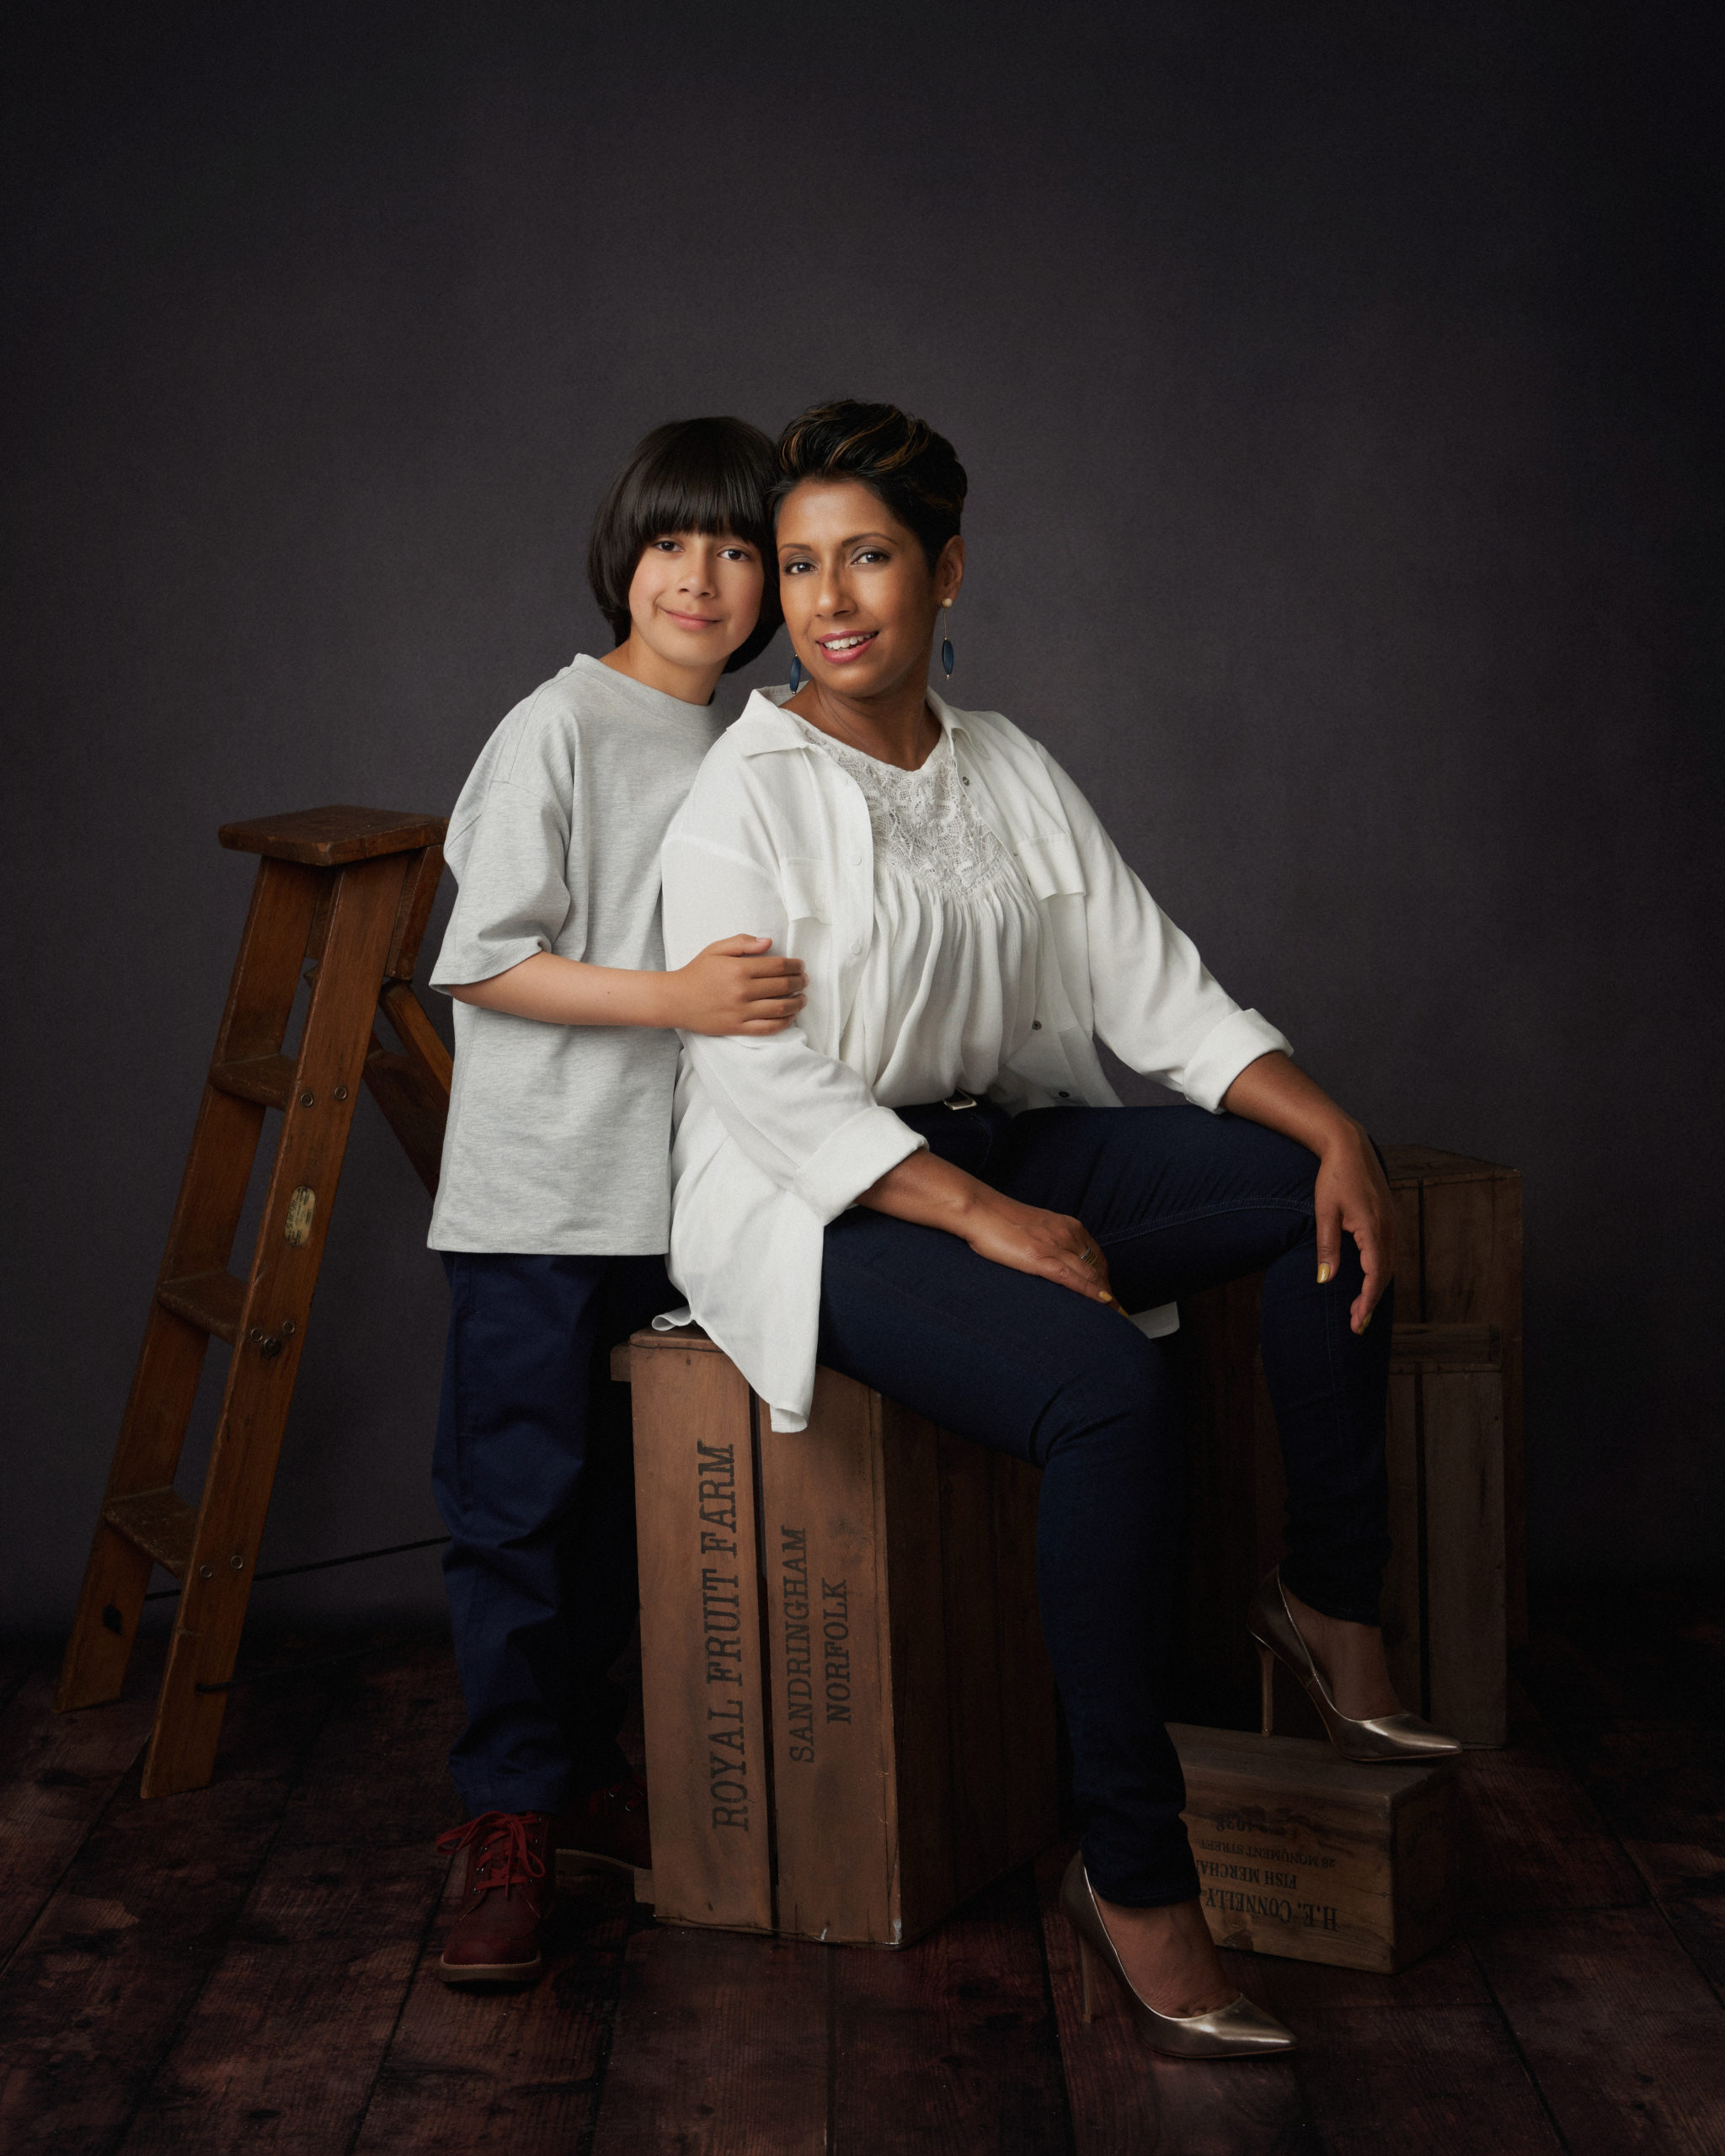
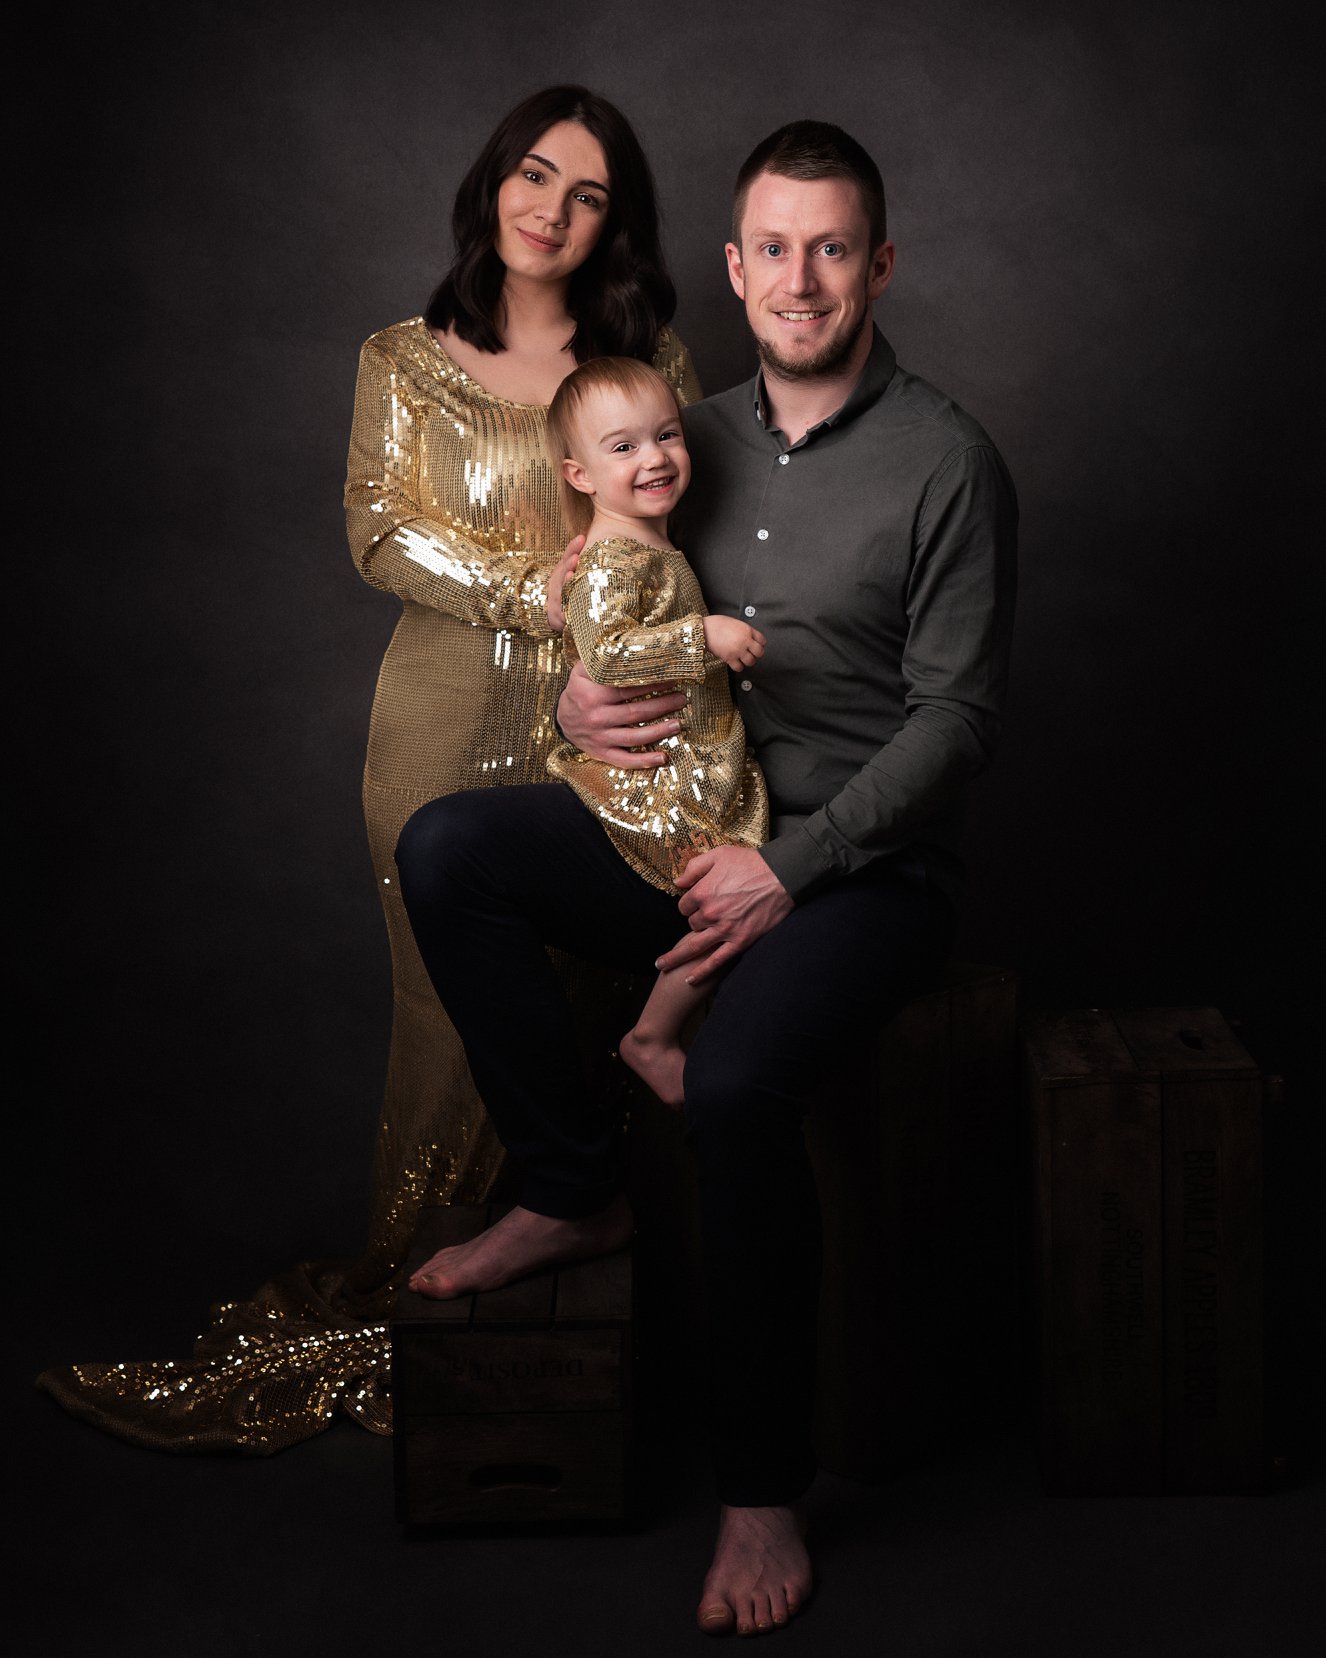
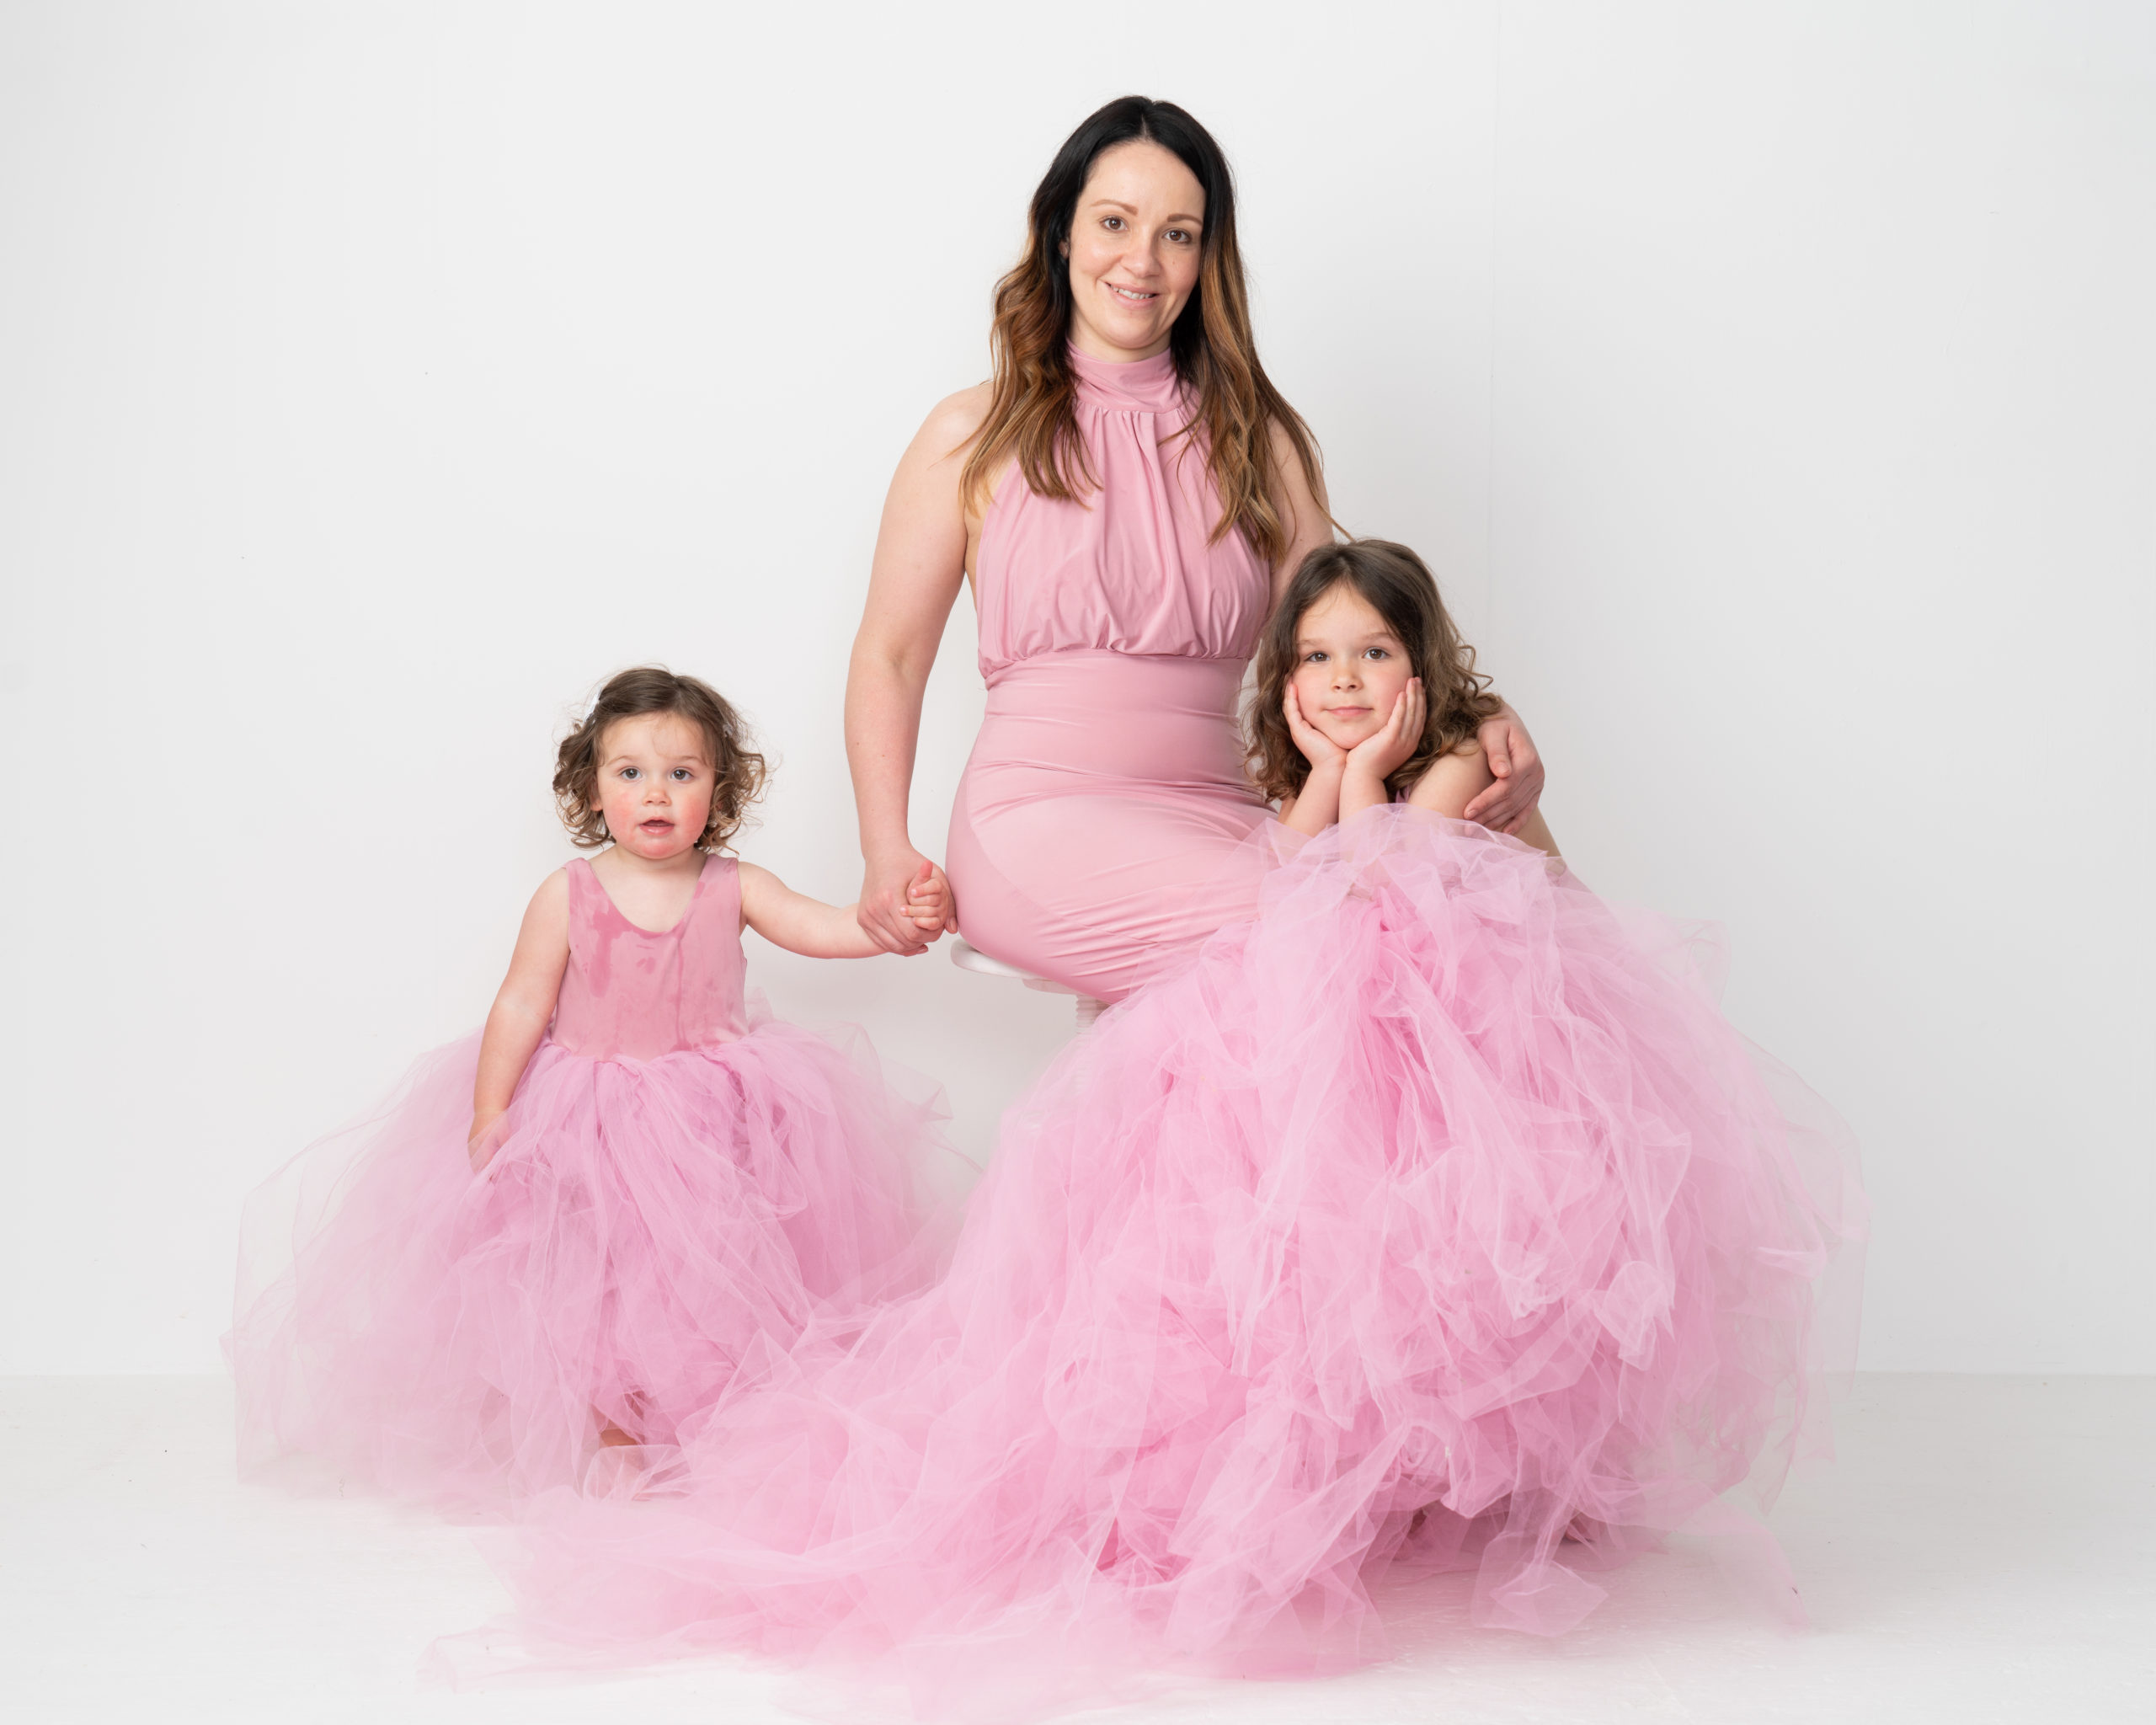
Outfits is a biggie. I love seeing matching or complimentary tones in images, but it is up to you. Again, for the reasons I put above, you are making an investment in time and money to have these images taken and the art on your walls, make sure you can live with them. Another thing to think about is will they match the décor in the room you wish them to hang? Talk to me about this and I will make sure we can come up to clothing colours and I’ll suggest studio background colours that will compliment to create a great image. If in doubt then neutrals like creams and beige are always great, I love denim with plain white and black. Greys work well on both light and dark but if you want bright colours, they can also work well as long as it compliments.
What about my arms?!
Sleeve length is another thing that people worry about. Quite often I find people don’t like their upper arms, if this is the case then go long sleeved, it works well if all are in the same but don’t worry too much if you have different sleeve lengths, it’s my job to make it all work in a portrait.
Feet and faces!
Footwear is a personal choice but it’s one I can help you to decide on. In my experience, shoes on or shoes and socks off work but it has to be the same for everyone in your group. Bare feet for everyone are timeless and won’t draw attention in an image. White trainers in an image of all black or dark colours will stick out like a sore thumb! If you have a more formal portrait in mind then you should encourage everyone to wear dark, smart shoes.
That’s enough of me talking about what to wear, but have a think about things like haircuts and nails etc. Mismatched nail varnish isn’t going to look great, the same as a brand-new hair style that you haven’t settled with yet. I want you to be comfortable in your images so don’t worry about all the little details, that is my job.
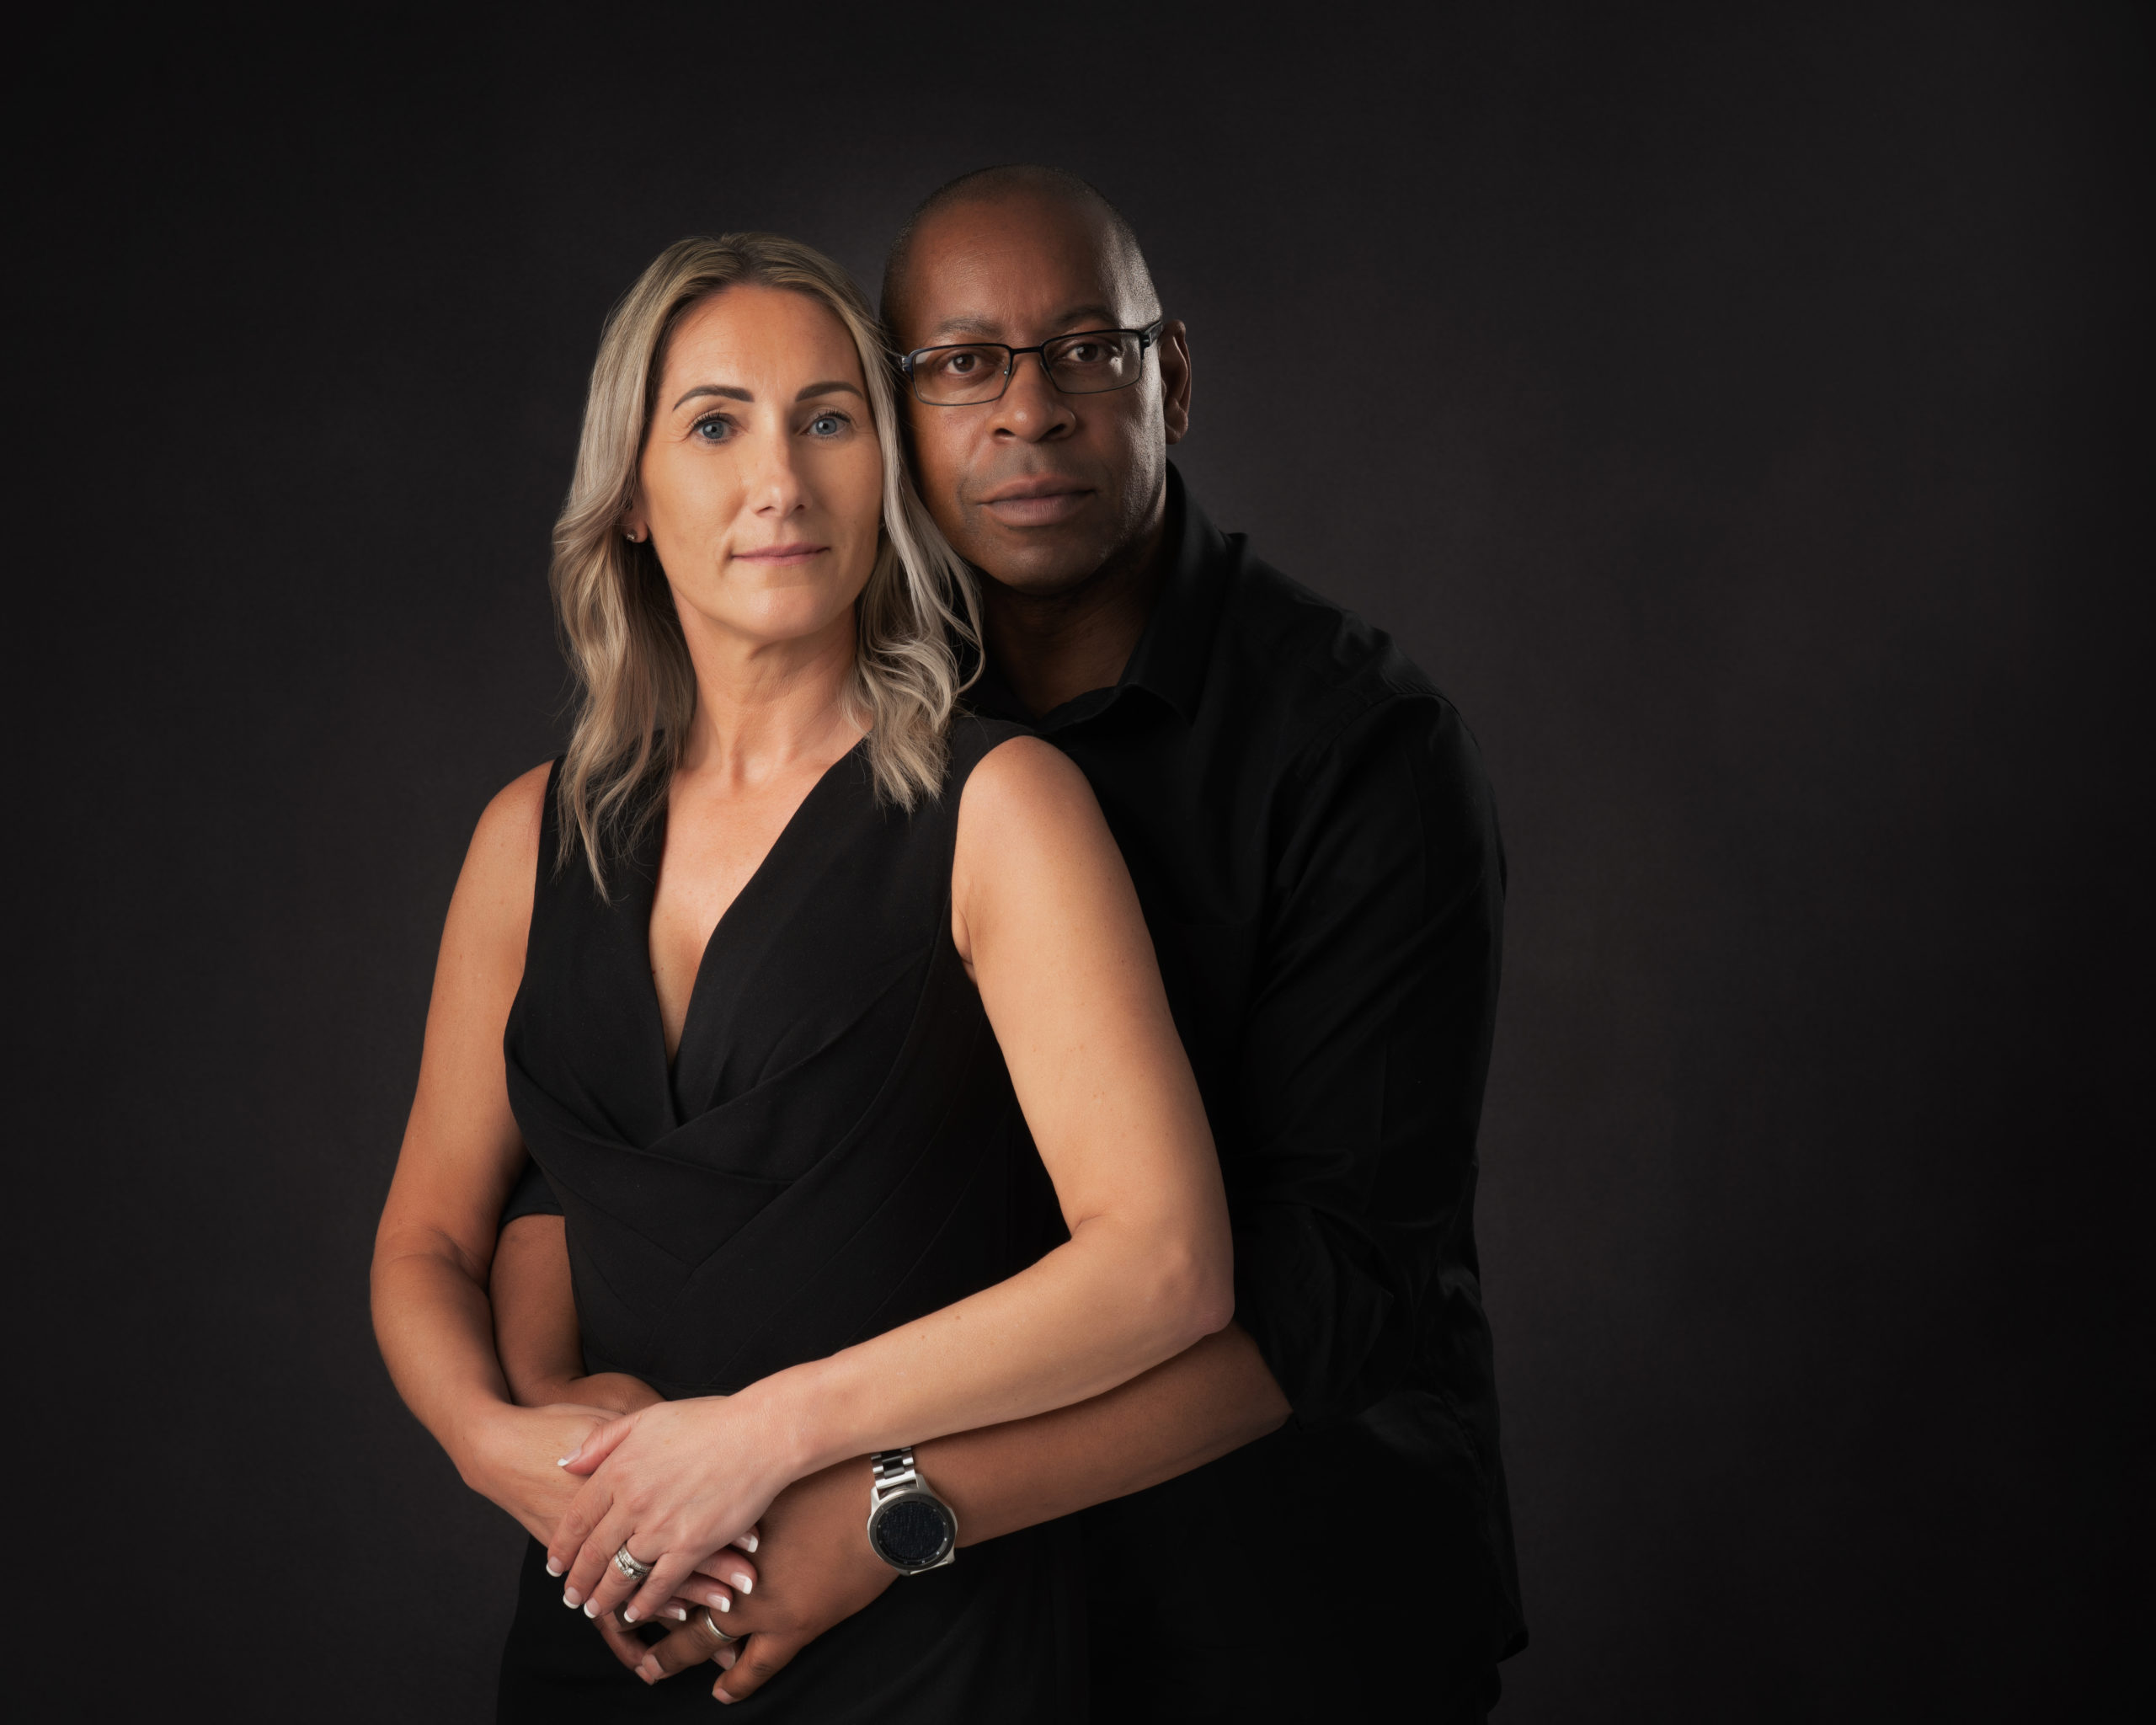
Which family members to include in your family portraits?
Last thing I really want to talk about it a little more personal, I often have parents, grandparents etc coming in with children for a shoot but not wanting to be in the images themselves. I hear all the excuses, wrong clothes, too much or too little make up, not lost weight or too thin… all the excuses as to why. Forget all that, It is about existing in portraits for years to come, to build that legacy behind you so that when the time comes when we don’t look like we do or in fact, we are no longer here for our children then we are still there for them in these lasting images.
If in doubt, get in touch and I will talk through things with you because, at the end of the day I want you to have the best portraits for your family at the studio in Preston, Lancashire.


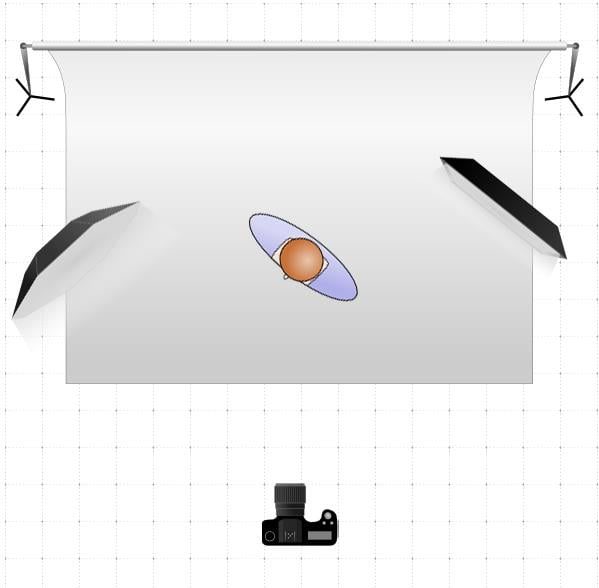
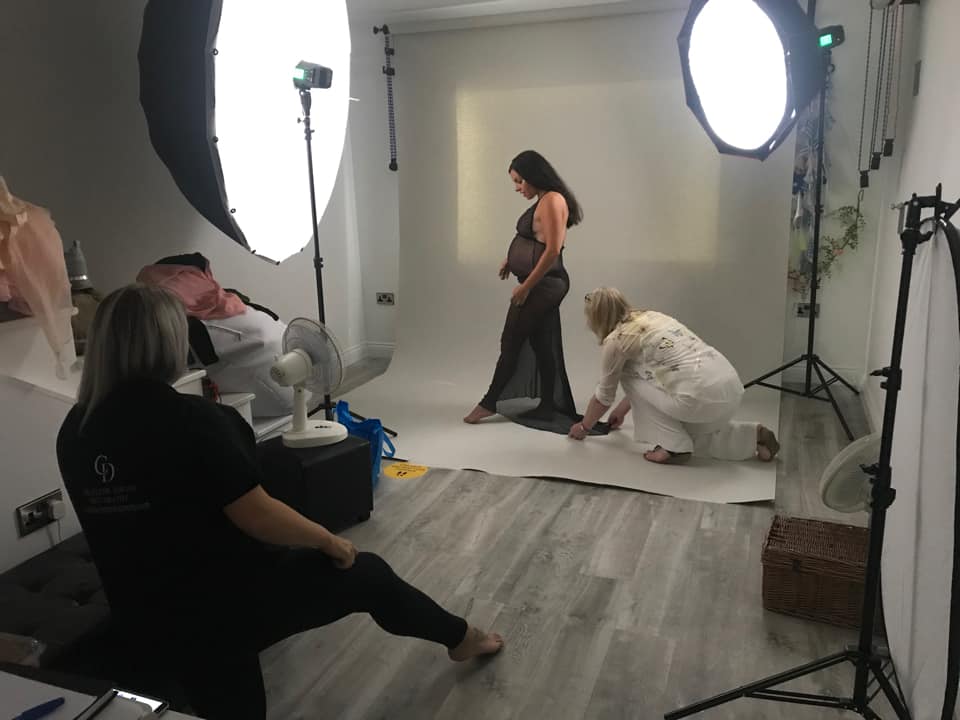
How to light this portrait - Maternity
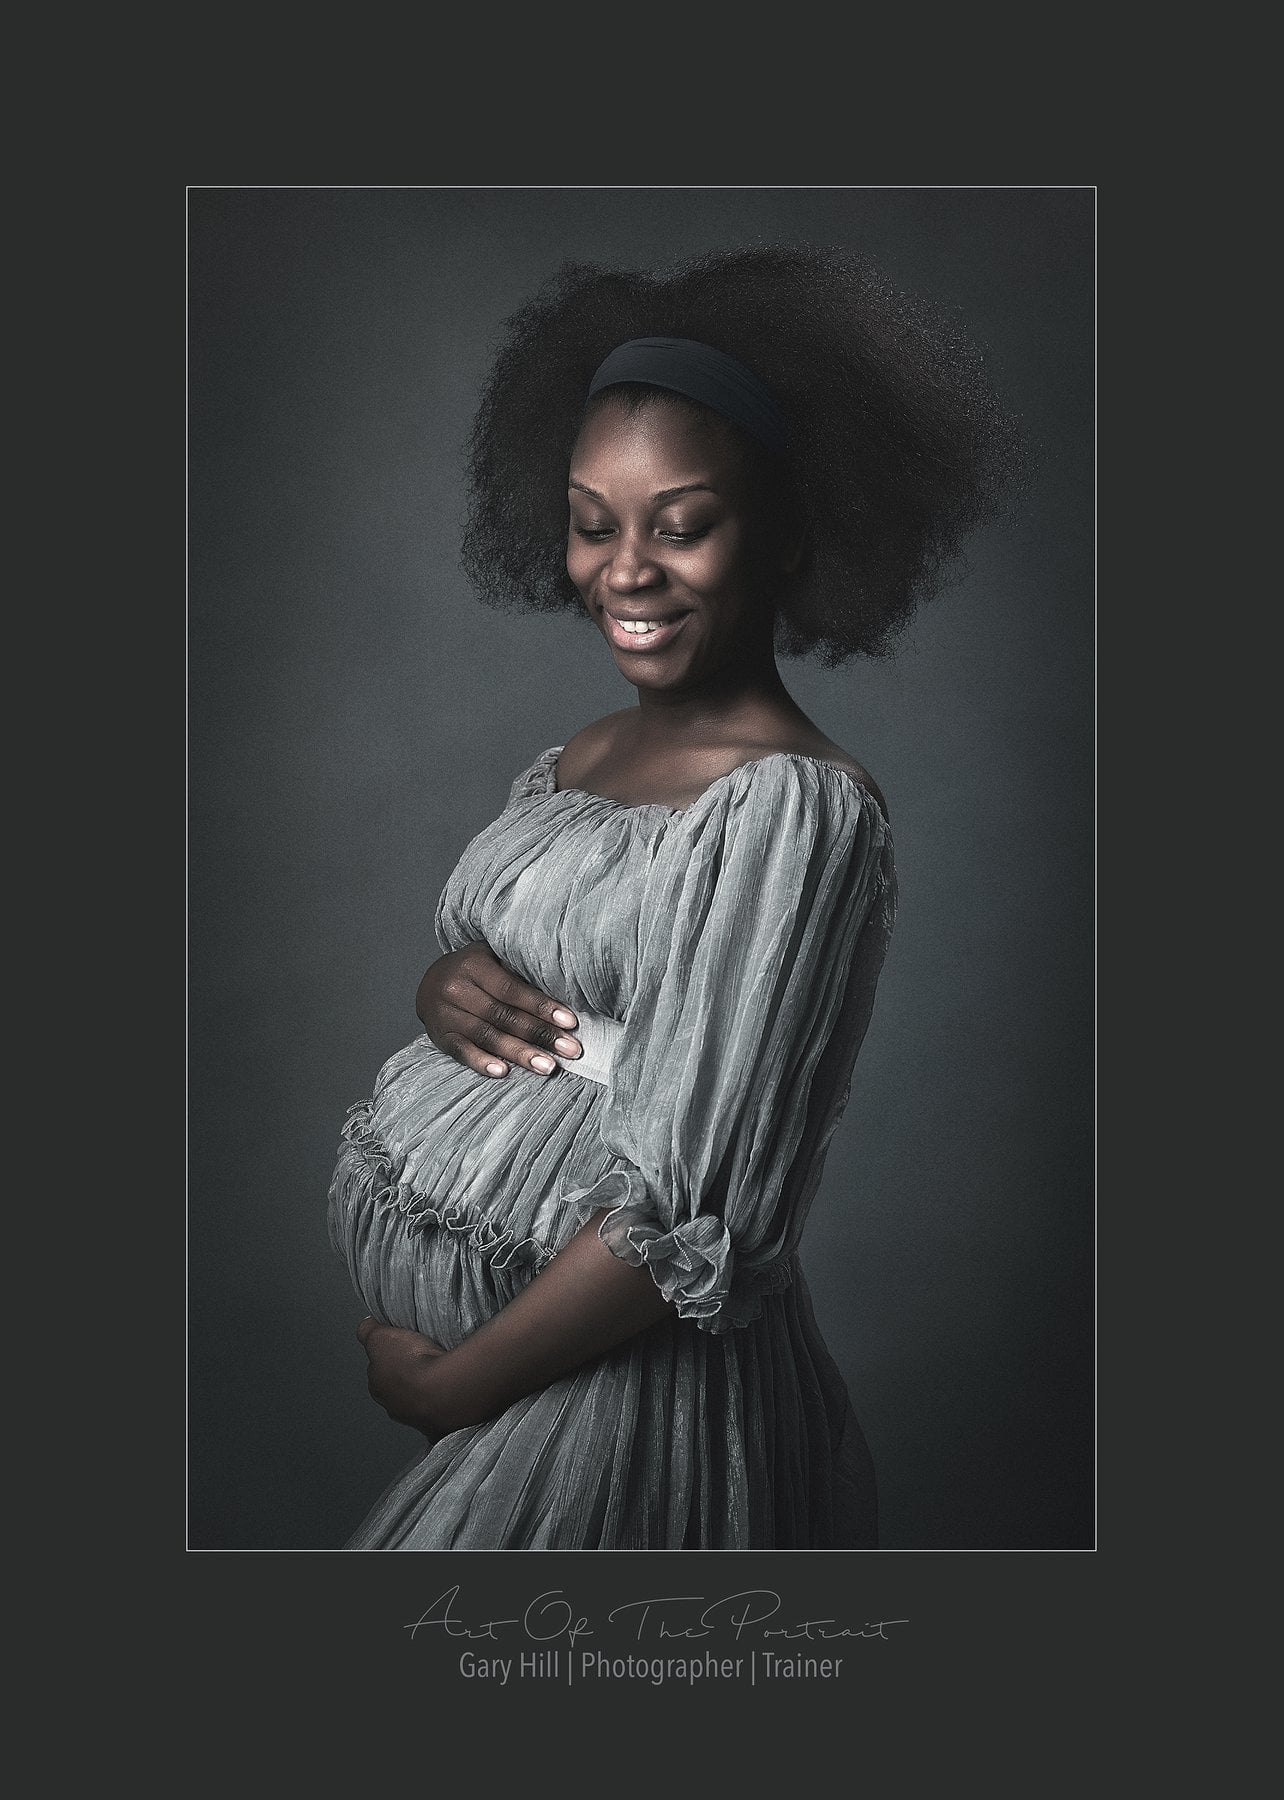
This is the gorgeous Tianna Jarrett-Williams, a fellow photographer, who I kidnapped to demonstrate how to light maternity when there was a training session going on at my studio in Preston, Lancashire. This was created and shot literally in a five minutes. So the how is very simple, feathered 135 octobox as key light, 70 deep box as an accent. The ratio would be smaller one at 1 stop less, in hindsight a 1/3 rd less than that would have been even better. The feathering on the key is to just graze that soft light across the front of the bump and also pick out those gorgeous cheekbones, the accent is to prevent total loss of hair against the dark grey background. Camera height is halfway to prevent any distortion and shot on the 85mm at f5.6, iso 50.
How to Light Maternity Photography - how to pose and light this image
How did I create this?
Why I shot it like this
I am going to talk about not just the shot but to the whole final image presentation.
The pose is very simple, the dress was a touch as it was not for maternity, so wouldn’t fasten at the back. This meant I was a little limited as to what I could do. Keeping it very simple with a top and bottom bump hand set up , cheeky angle on the head just looking beyond bump to prevent neck compression then probably said something cheeky to get the expression (Tianna and I are friends so I can get away with it, judge your client before trying it!). The crop is just a simple half length as the dress fit better that way.
SO, into PS after a simple raw conversion and then skin tidy , some dodge and burn to really pop the cheek bones and localised sharpening to bring out the details. Now this dress I have shot probably 20 times and try and make it different so popped it into alien skin to give a colour grading which you see here ( no idea which preset, probably a mix of 2 or 3 ). A vignette was added as I prefer to shoot with a large light source for the quality of light on subject which causes background spill which I can then pull down with a curves vignette. That was the retouch finished but I liked the tones and cohesive nature of this so felt the stroke line and border added to the final presentation, the colours of both are sampled from the image to make the tonal range flow through it all.
That’s it really. A simple but effective shot .
You can purchase exclusive access to maternity lighting and posing instruction videos, along with regularly updated content and ongoing support in a members only group.
Why Use a Light Meter?
As everyone who has had photography training with me will attest, I am a little obsessed with my light meter. It is one of the most important bits of my kit bag and I would feel lost without it. Let me address the excuses I’ve heard for not using one; I don’t need one. I can judge it in the back of the camera. Digital is free so I just adjust and re shoot until I get it right. Close enough will do, I can fix it in post…
Camera screens are all over the place, I can take the same shot on ten different cameras and review on the screen, they will all be different. Firstly, they are all displaying the embedded jpeg, not the raw file – I assume you are shooting raw so will have applied some processing to the file. Whatever your picture style set up is, will affect the jpeg preview. So, in essence it isn’t accurate. Secondly, everyone has their screen set up differently. My own preference to set my camera screen is to load up an image onto the computer (on a calibrated screen), then pop the card back in the camera and pull it up on screen. I then adjust my screen on the camera brightness until it is as close as I can get it to the calibrated screen. That gets me the best preview I can. The same with the histogram, it is read in the camera from the jpeg so isn’t totally accurate.
Why you should ALWAYS use a light meter in portrait photography
I can use the back of the camera
Digital is free, I’ll fix it later…
Digital is free right? Well, it isn’t going to cost you more to shoot 50 images over ten in money, but it will cost you time. time reviewing, time loading into the computer and time culling, time is money to a professional so it does cost.
Fixing it in post, again, takes time and time is money and secondly, any exposure changes is going to degrade the file, so getting it right in camera is better for the final product, always.
How do you use a light meter?
Ok, so what do you do with it? Once you have your meter, have a read of the manual, learn how to change modes, set shutter and iso. When you have done that, in available light, just point it towards the light source and then press the button. If it doesn’t give you the f stop you want, change shutter speed or iso until it does. Simples.
Using a light meter with a flash
With flash, it’s slightly different. Firstly you set it to flash mode, then on most meters you press the trigger button and it will make the flash sign blink, that means it is ready to receive a flash signal to read. You then point it from subject towards the light and then press the flash trigger. It should then give you a f stop (set iso to what you want and shutter speed on meter to 1/125th of a second). The number it gives you tells you how much light is being measured. You then decide if it is what you want to shoot at. Think of it like a measuring jug. If you say decide you want to shoot at f5.6 and the meter is saying f4, you need to turn the light up until when you test it on the meter it gives 5.6, if it said f8 then it needs turning down, just like filling or emptying a measuring jug.
If you want to learn in person studio lighting, take a look at my upcoming workshop which will cover light meters, lighting patterns and much more
It helps you to be precise
The meter also allows me to measure individual lights to control the relationship or ratio between them. If I want an accent light to blend seamlessly with my main or key light then it needs to be at least one stop less as light from the rear appears one stop brighter than it really is. Only using the meter can I measure this accurately. It’s this precision I love the meter for.
Last reason I like it is that it makes me look professional. I often get asked what it is with clients, I tell them and show them what it does, they understand then that I care about precision and getting things right. I also, as an educator, often get asked to speak at conferences to train photographers. I love the fact that the meter allows me to, under pressure, set up a lighting set on stage, shoot tethered to the projector and have it straight on screen out of the camera and get it right. It builds people’s confidence in my skillset.
Review of Photography Mentoring
I choose 1-2-1 photography mentoring with Gary Hill so that I could take advantage of all his time, knowledge and experience. Having followed Gary for a few years, I loved his style of light; how each individual picture captures features of the subject making his work extremely noticeable. I chose Gary because I wanted to push myself and tweak bad habits I have as a photographer. I wanted to learn more about different sources of light and how it can change a whole image using different lighting techniques. Having joined The Guild of Photographers I wanted to push myself to awards higher than the bronze awards I was already receiving. I knew Gary was the mentor to do this.
I had photography mentoring with Gary... this is my honest review.
We covered lots
I spoke with Gary leading up to my 1-2-1 about the areas I wanted to cover; gels, posing, how to shoot on a white backdrop, headshots with the triflection, full length shots using natural light, one source or light then introducing a second light to change the image completely.
The day was jam packed of tricks, helpful tips and lots of fun and laughter. Gary arranged two models who were very relaxed. There was no pressure to understand quickly, if you didn’t get it Gary would explained it until you did.
I learned so much
The lightbulb moment for me is my confidence this is the issue with me, Gary taught me simple methods on how to spend more time capturing and trying out new things and getting it right in camera then spending very little time to edit. He built my confidence then and now, Gary’s after care is great he never stops pushing or helping you grow.
The workshop has helped build my confidence and style as a photographer I’ve gone on since to win high bronzes and a silver award with the guild.
I’ll book again!
Having completed this 1-2-1 with Gary it won’t stop me from doing so again, there’s so much to learn and grasp with photography. I loved watching him work the camera and the lights. Overall I had a wonderful experience and hope to return again this year!
When I return again I would love to cover more with family posing
The overall experience is just what I wanted to get out if it. Gary is a fantastic mentor.
Lindsay Betts Photography
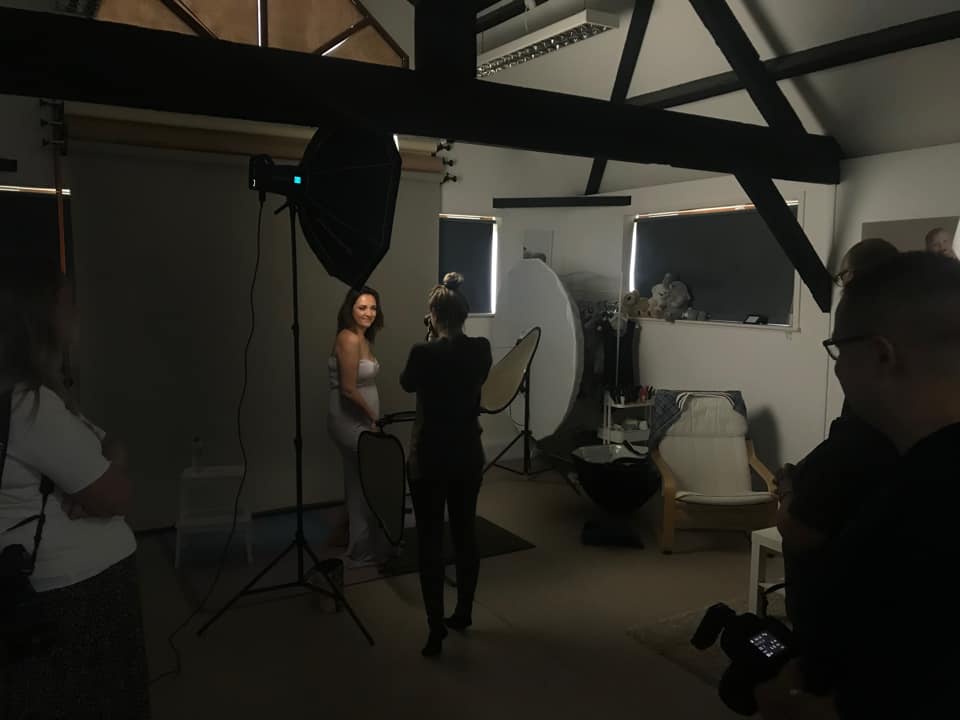
10 Things Your New Photography Studio Needs
Every photography studio is different, some are very clinical, others quirky and some are so homely. How you set yours up depends on how you shoot and who your client is – but there are certain things that I would recommend you have in one. One piece of advice I always give is “buy cheap, buy twice” – if you scrimp in the early days, you’ll end up regretting it and having to replace things. Spend time researching what is the best for your new photography studio, and your kit will last for years.What you need in your photography studio
1. A comfy sitting space for clients
Whether you are having a chat with clients when they arrive in your photography studio, changing set ups or want a space for parents to sit while you are photographing their children, a comfy seating area is so important. Something that is easy to clean when you get children with messy fingers are in the studio is what I would recommend. A small sofa or a couple of chairs is ideal and if you shoot some boudoir, a sofa bed like a click clack style is handy as it can be multi purposed.
2. A drinks station!
A kettle in your photography studio for those of us that like a warm drink (white coffee for me, please!) and always a few bottles of water for you and the clients. A coffee machine is a nice bonus, but I prefer a cafetiere as it takes up less room. De-caff options and fruit teas are very popular, especially if you shoot maternity.
3. Parking or access nearby to parking
Almost all clients unless you are based in a city centre will be travelling by car so somewhere secure and close that they can park is pretty essential. It’s a good idea to provide directions with parking info to your clients ahead of their portrait session – they are more likely to arrive on time that way!
4. Samples of your work
So, so important. Clients buy what they see, so if you want them to buy wall art or albums, make sure you have samples on your wall. BIG as you can get away with is what I would say and only items you want to sell and that compliment your work.
5. Sockets!
No matter how many you have you will need more and always have a couple of extension leads. You need to move your lights around to suit what you are shooting so make it easy for yourself and have places you can plug in.
6. Storage
It doesn’t matter whether you think you won’t use many props in your photography studio, you will accumulate lots of items and they need to go somewhere – not on the floor! Things always look better when they can be put away, so get as much storage as you can fit in without encroaching on your shooting area.
7. Stools and crates or other posing aids
These can transform your images in particular if you shoot groups or families. Find something you like and try and get different sizes, so you have one for every eventuality. My Blessence Props Crates are my most used items after backdrops.
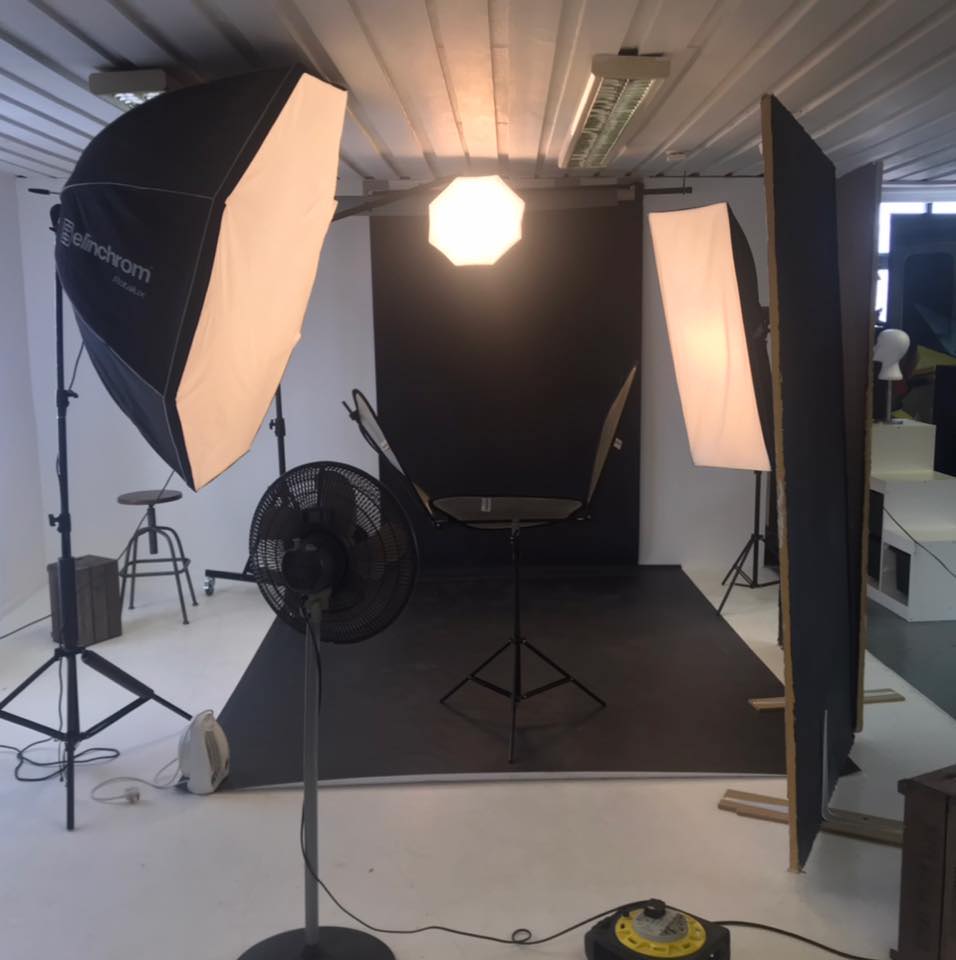
8. Lights and modifiers
Even if you only shoot with one light, get a spare and at least one big modifier and if possible a strip box too. With those two and two lights, you can do so much. Backdrops that suit your style, if you don’t like it, don’t have it. Items like a TriFlection from Click Props are great additions to a studio light set up.
9. Viewing area
Use of a large screen TV or a projector to show the clients their images is a fantastic addition, and a laptop or computer that can link to Youtube or iPlayer can keep young children occupied if you need to work with the adults.
10. Facilities
At some point, someone is going to need the toilet and it is ideal if it’s in the same area so you can keep the flow of the shoot going as well as possible if a toilet trip is needed, a private changing area as well or a suitable screening off portion makes clients feel very comfortable whilst changing. A baby changing mat is a useful addition if you have babies and families visit you, wipes and nappies can be useful to have to hand, too.
Why Choose 1:1 Photography Mentoring
I have been training photographers and offering 1:1 photography mentoring for many years – both professionals and beginners. I am passionate about raising the quality of portrait photography for everyone. If you’re looking for photography mentoring, you’ll find an array of different options available – online workshops, in person small group photography workshops, larger group workshops and 1:1 mentoring. Hopefully I can help you to choose what’s right for you. There is some information here, and on the training page of my website, but do get in touch with me if you’d like to discuss it in person.Why Choose 1:1 Mentoring to improve your Photography
1. Bespoke to you.
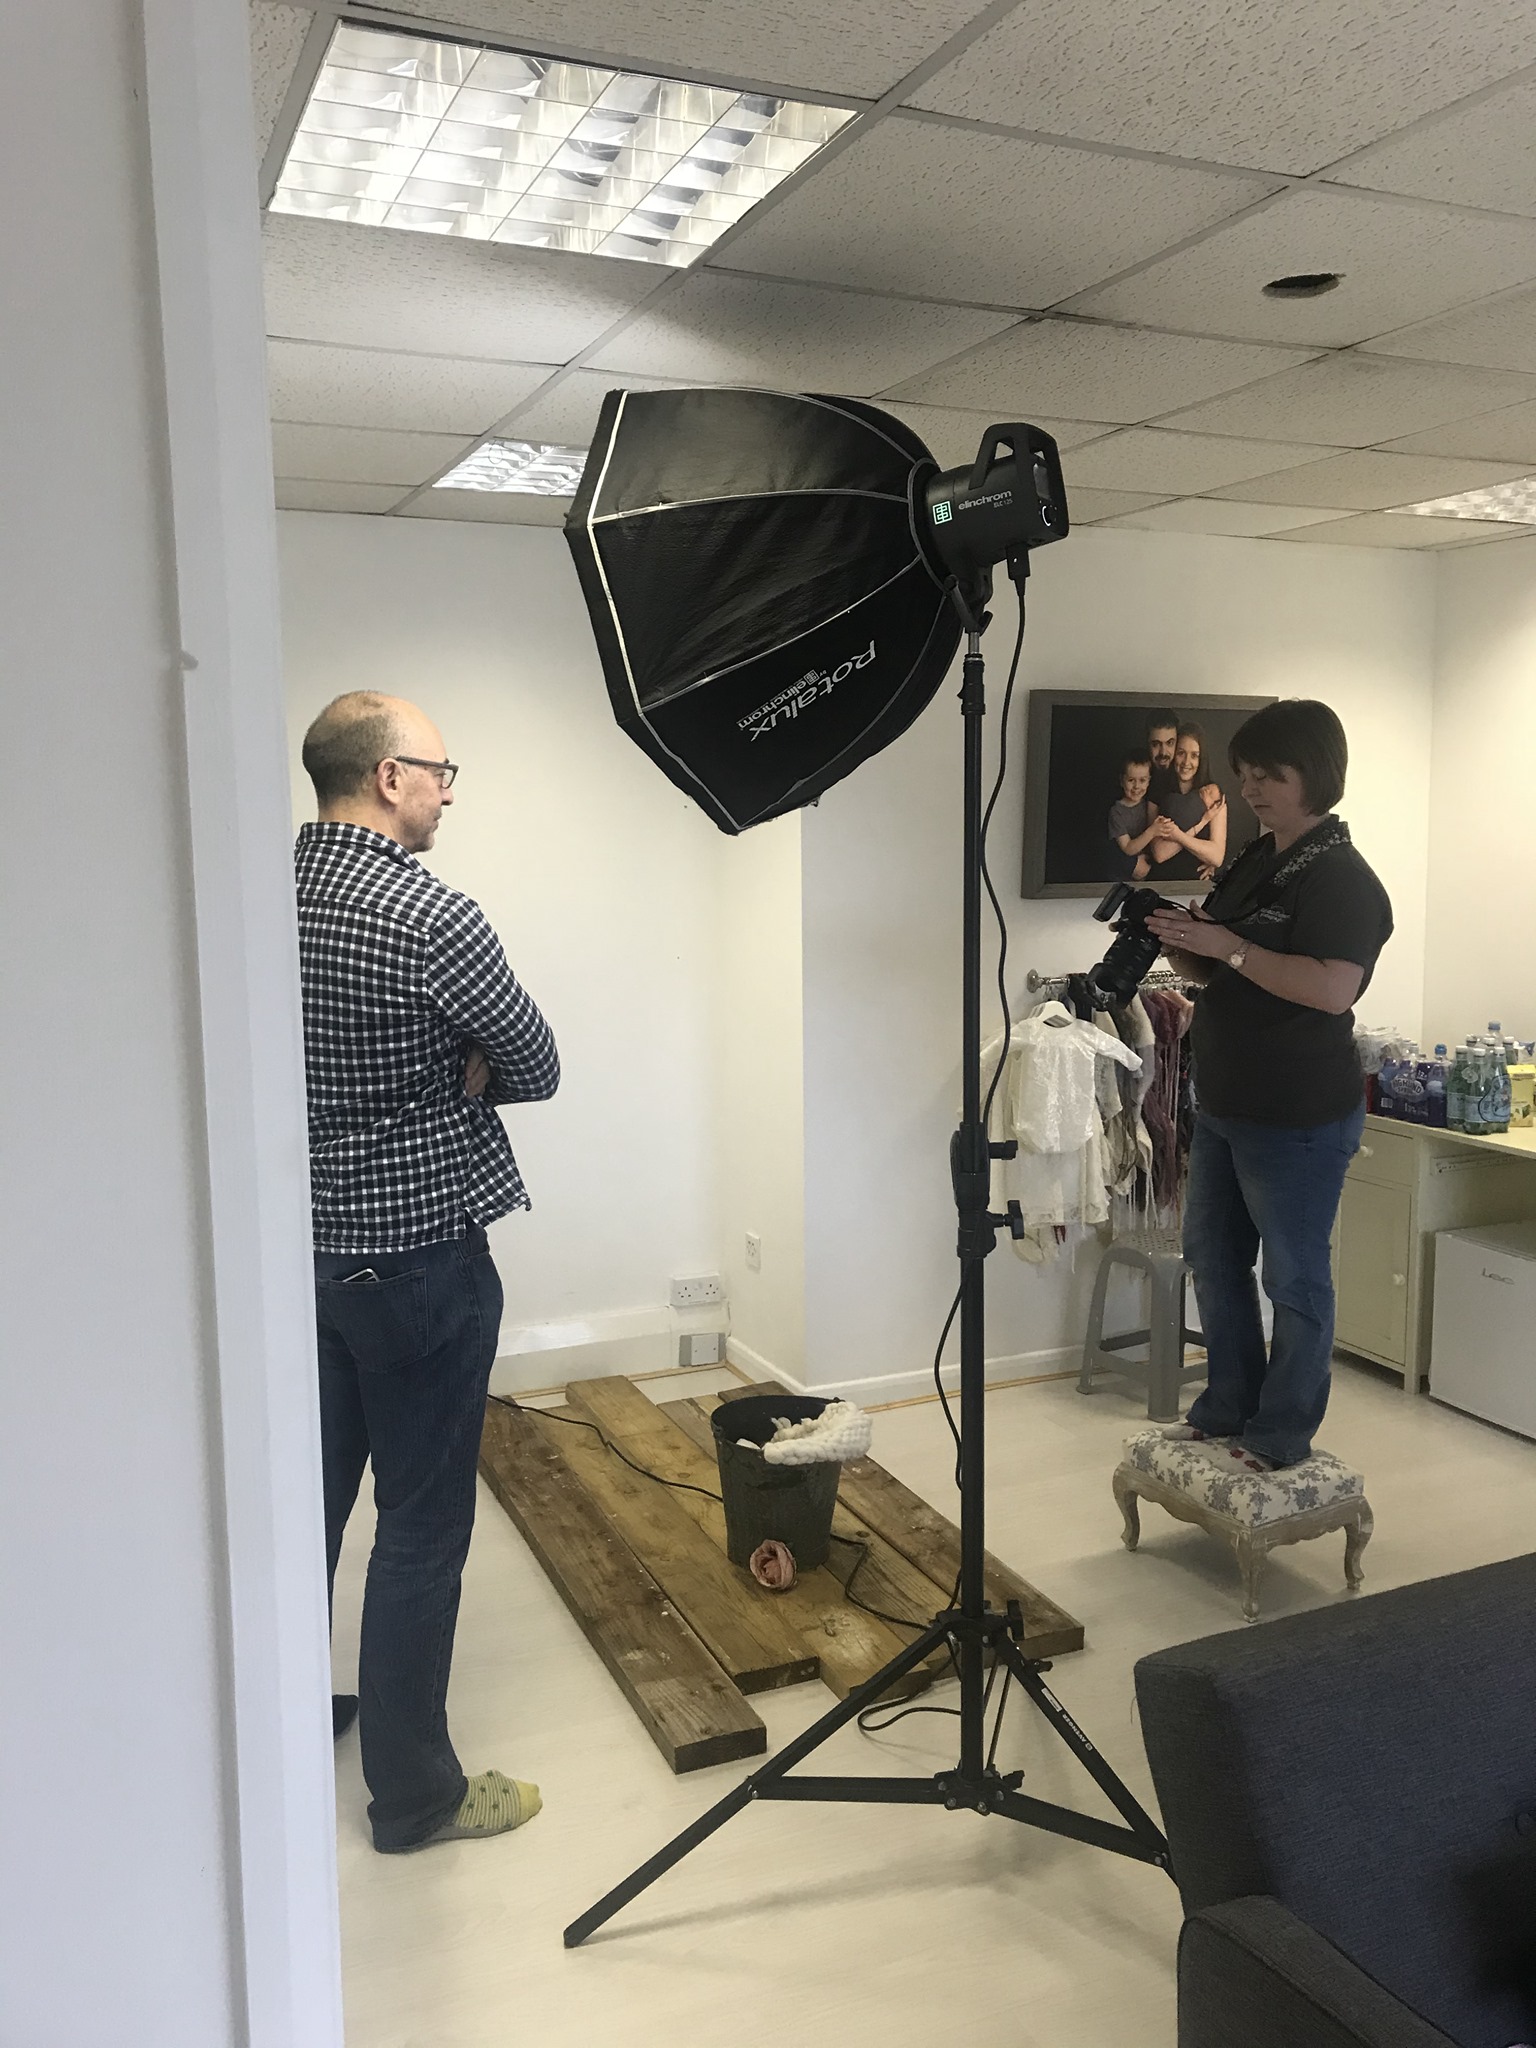
Whether you are a complete beginner or a seasoned veteran photographer, you are never finished learning. A 1:1 photography mentoring session with me can be completely bespoke to your needs, what you want to work on and how you learn. Whether you are looking for a day learning about fine art photography, or a half-day in the studio and a half-day editing, or even ongoing support with regular training throughout the year, we can design your photography mentoring to be all about you.
2. In your own space, or in mine
I travel all over the UK and throughout the world to deliver photography training. Coming to you means that you can learn the very best ways to use your props, posing aids, lights and studio space. I can even help you to decide what you may need to buy to add to your studio collection if you want.
If you don’t have a suitable studio then you can come to use mine and I will train you using the very best Elinchrom lighting and modifiers from The Flash Centre, and a fantastic selection of backdrops from Click Backdrops. You can use this knowledge whether you are mobile or use another space to work from.
3. Find or develop your own style
In a workshop, a group of people will inevitably lead to more generic training, whereas a 1:1 means we can concentrate on your own style of photography. Whether you prefer light and airy, vintage, fine art or high key, we can spend a day working carefully on your style of photography.
4. Concentrate on one genre
If there’s something in particular you want to excel in, in a 1:1 mentoring session we can concentrate on the genre you want to specialise in. If you’d like training in boudoir posing and lighting, we can concentrate on that, or if you’d like to work with younger children, then that’s OK too. You’re in charge of your training and I’ll help you with whatever you would like me to!
5. Some things are just better 1:1!
When we are working together for 1:1 photography mentoring, there are some things that we can do better than in a workshop! For example, I can demonstrate a skill, then watch as you try yourself, and make tiny adjustments to show you exactly how to get it right. We can sit together at an editing screen and I can show you the small edits that will make a huge difference to your image. It’s all about you – and how I can best help you to become a better photographer.
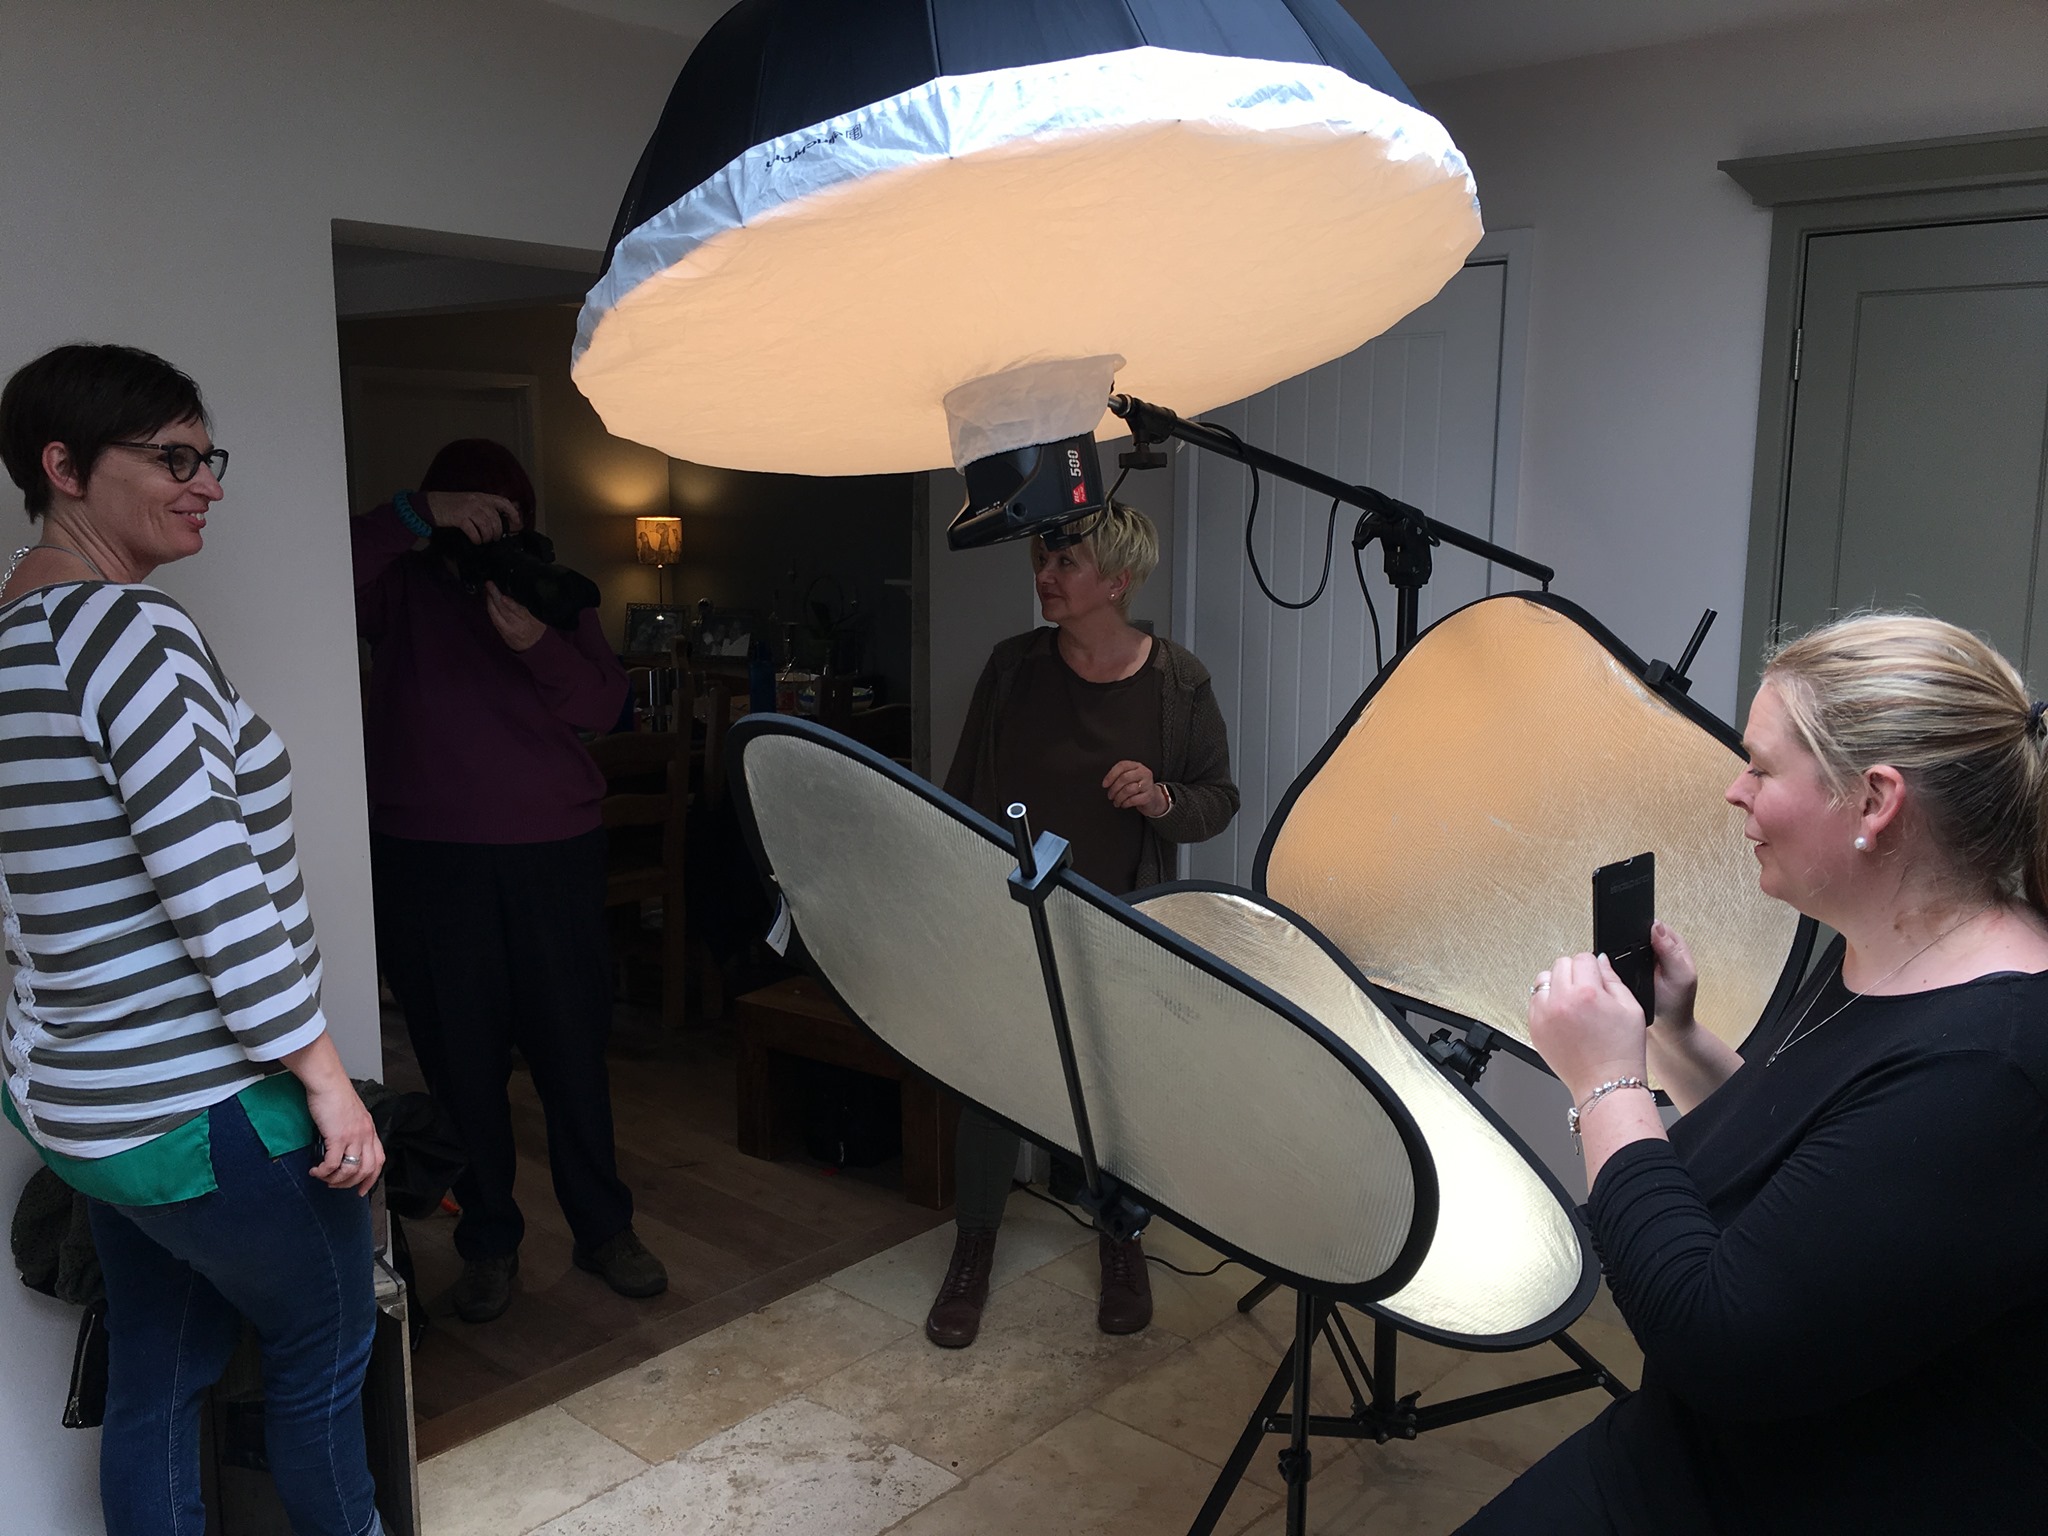
Why Choose a Photography Workshop
I have been training professional photographers for many years – I am really enthusiastic about raising the quality of portrait photography for everyone. When you are looking to book photography training – whether it’s your first or you’re a seasoned trainee – you’ll find an array of different options available – online workshops, in person small group photography workshops, larger group workshops and 1:1 mentoring. Hopefully I can help you to choose what’s right for you. There is some information here, and on the training page of my website, but do get in touch with me if you’d like to discuss it in person.Why Choose a Photography Workshop Over 1:1 Mentoring
1. A photography workshop is affordable.
In a group photography workshop, the cost is lower as it is shared amongst the participants. It’s a great option if you are a beginner looking to learn lighting basics, studio lighting or posing. If you’ve been a photographer for a while and you are looking to improve a specific skill, such as portrait posing, working with a certain age group such as children’s photography or if you want to specialise in a gentle such as learning fine art photography.
Usually, you can book a photography training workshop with a deposit, and the balance to pay at a later date, usually a few weeks before the workshop date.
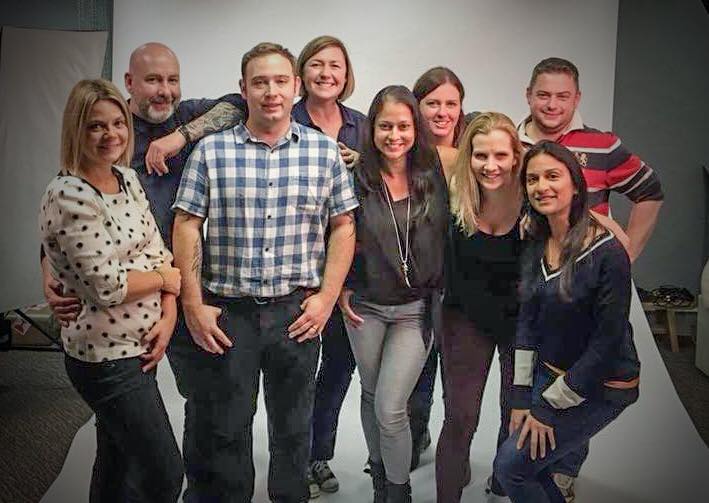
2. Meet other photographers at a similar stage to you for peer support and friendship
A photography workshop is a fantastic way to make friends! You’ll meet a small group of like-minded people, with a passion for photography who want to learn more! If you are at a studio photography workshop, you will take it in turns to be hands-on and to try out your new skills.
Many of my workshops lead to long-term friendships, and often groups will book to return for a workshop on another aspect of photography with the same group of people! It’s a great way to develop a support group group and to make new friends!
3. Others will ask questions that you hadn’t thought of yet!
In a photography workshop group, you will have photographers with different backgrounds and different skill-sets coming together. There may be questions that you haven’t thought of yet that others will ask, and you can share your experience with each other, as well as learning loads from the workshop.
4. You can arrange to practice with other people after the workshop is over.
You will learn so much in my workshop. Not just how to light and pose, but why what I’m teaching you works well. Understanding the reasons behind good posing and correct posing makes it easier for you to reproduce it again yourself later.
Being in a group workshop means that you can arrange to meet up with others to help each other practice! Two heads are better than one, and you’ll all excel at different things, so comparing notes and practising together is a great way to consolidate your knowledge.
5. If you’re uncertain of speaking out there’s safety in numbers!!
Some people can find a 1:1 session intimidating. I’m really not scary, and will always take any training at your pace, but if you are particularly shy then you may find a little more anonymity in a group photography workshop rather than with 1:1 mentoring.
In a group workshop, you can be as quiet as you would like, or speak up as much as you are comfortable with. You will ultimately learn more if you join in, but you can choose whatever you are happiest with.